Monday, December 20, 2021

Cherry Pound Cakes

Are you in a baking frenzy ahead of the Christmas holiday? If you’re like me, you’re practically done. Admittedly, I’ve had to be a little obsessive-compulsive this year with preparations, since there was so much going on in my life this month — my dad’s 100th (yes, 100th) birthday party; a three-week-long visit from London by my five-month granddaughter and her parents; and a new addition on the house that has me dizzy with all the decisions to be made. Still, getting organized is the best way not to stress, so I’ve made this large cherry pound cake to tuck away in the freezer for one of the Christmas eve desserts, and these minis to gift to friends and neighbors. 

I confess, we’ve eaten a few of the minis and they are so delicious, with their tender crumb and subtle almond flavoring, that they’re going to become a regular Christmas tradition. I saw the minis last year on Annie’s blog  and tucked away the idea for the future.

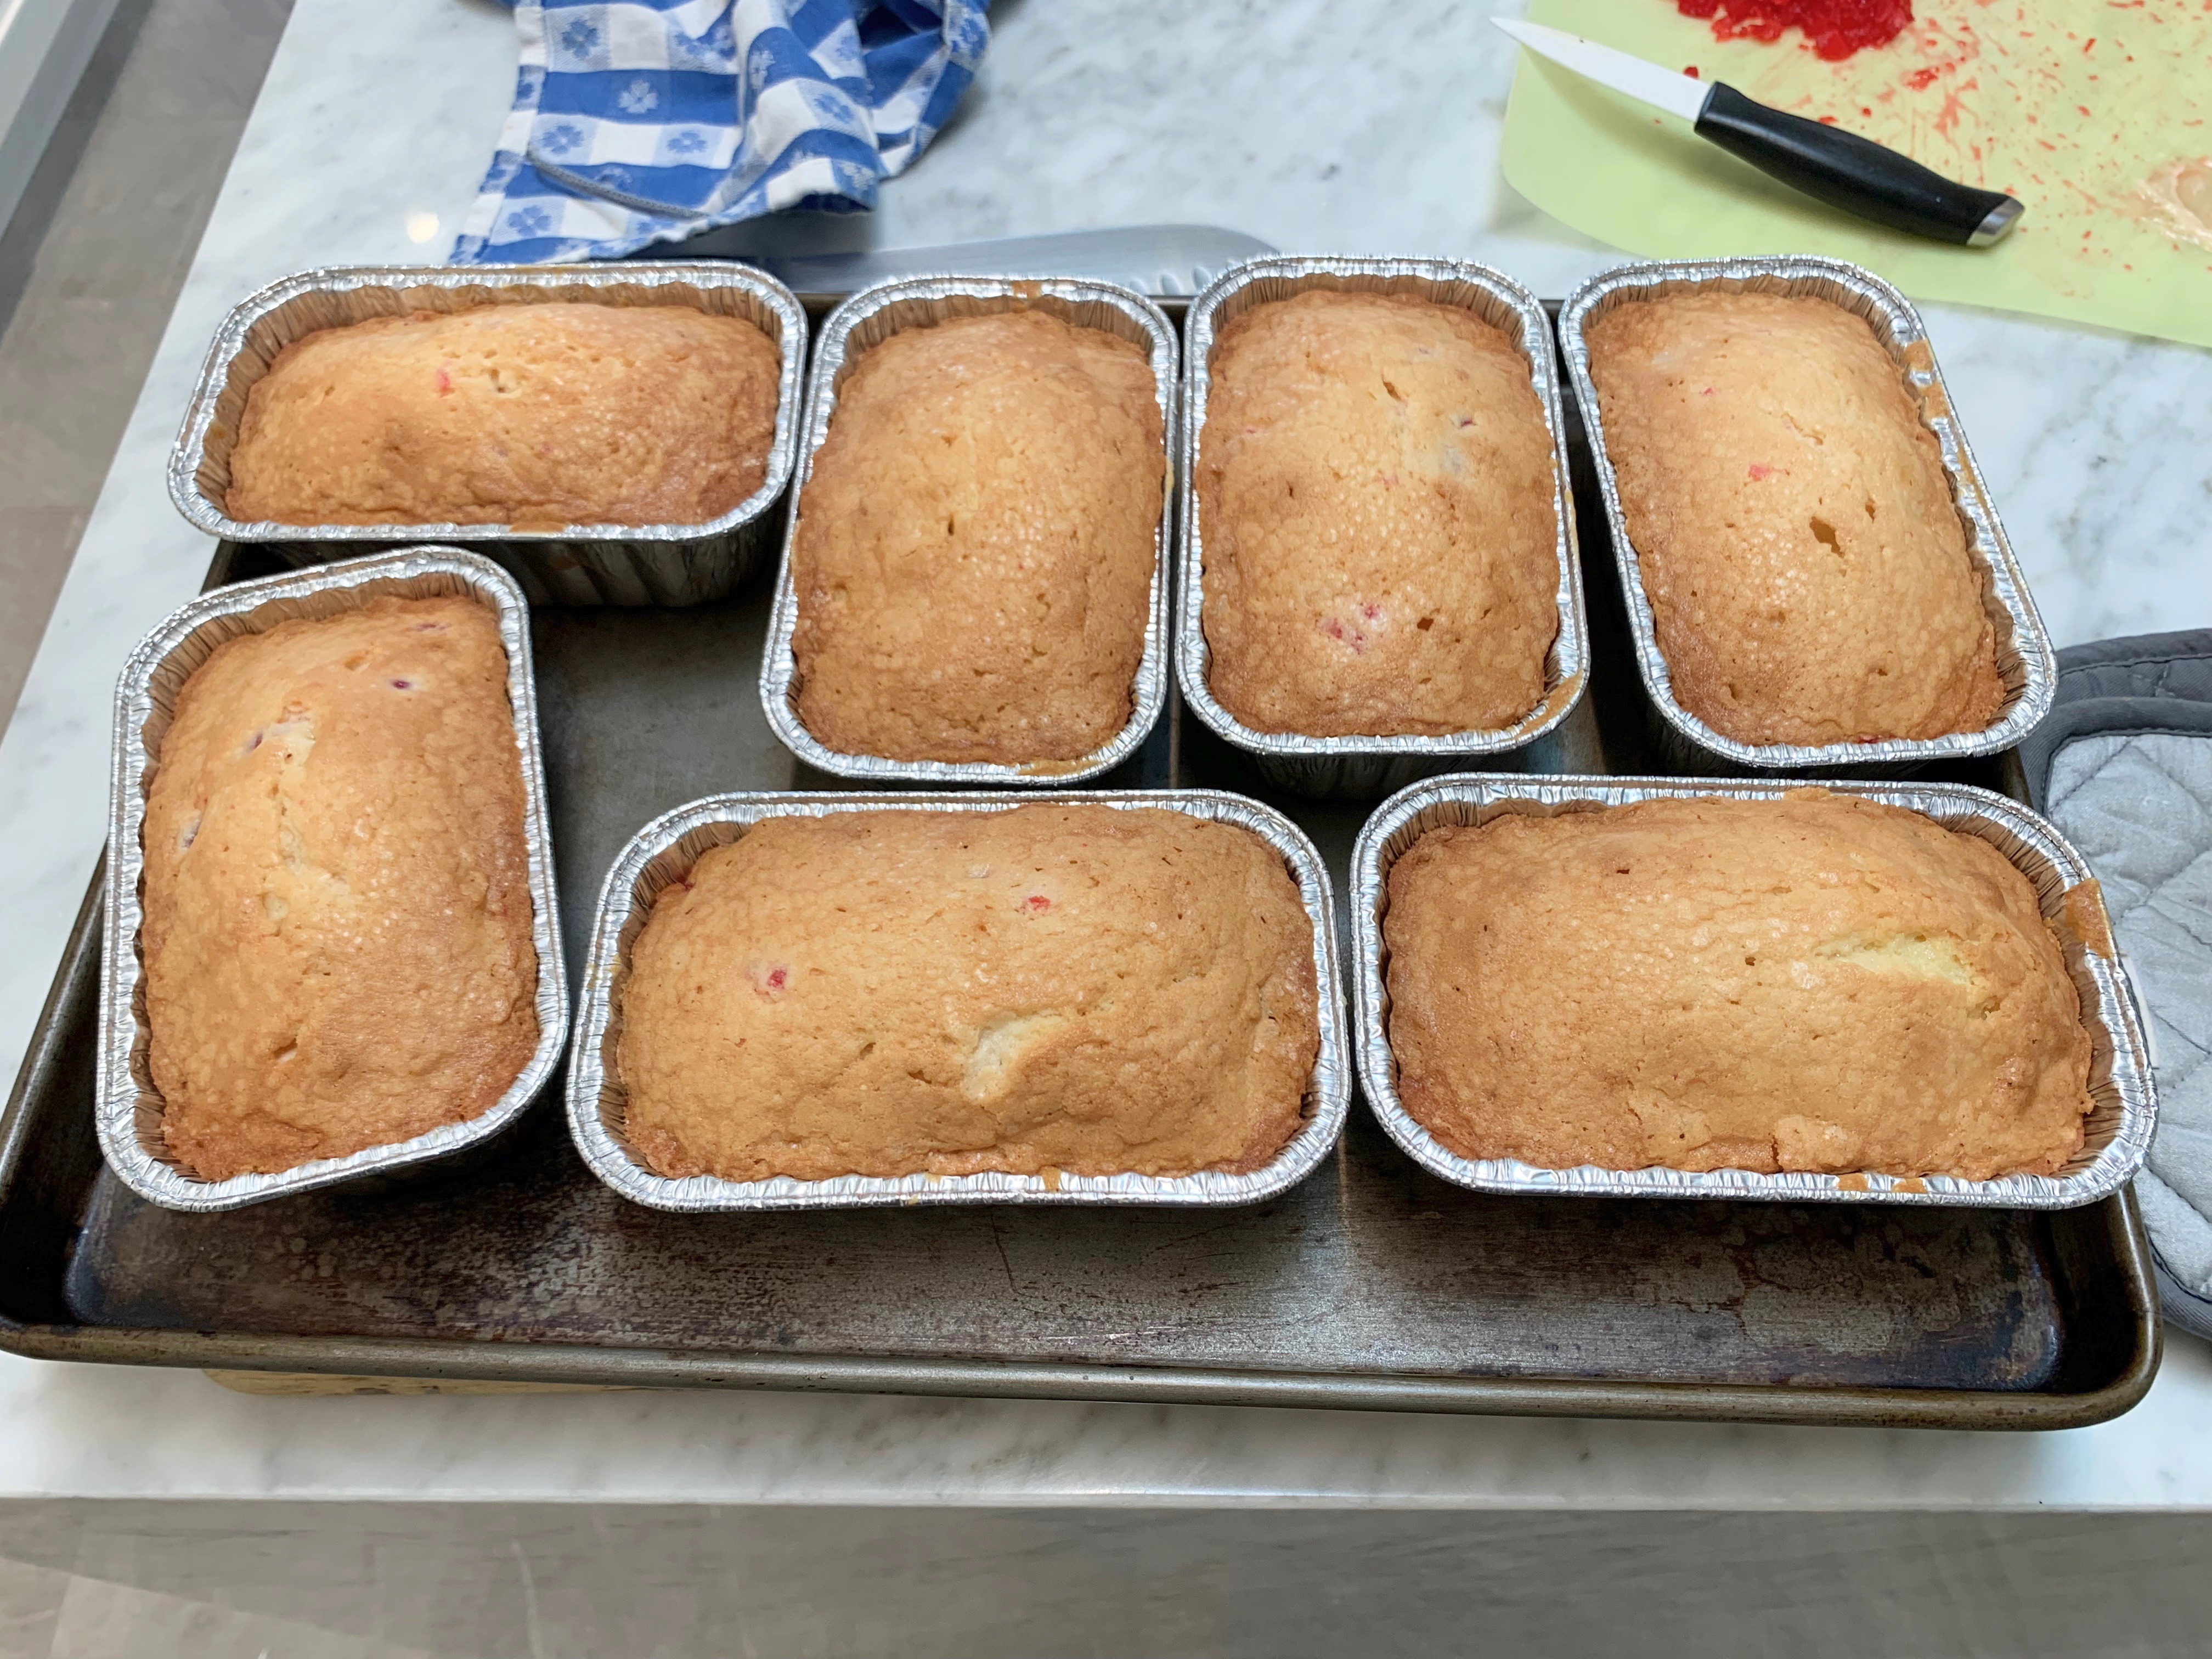
The original recipe is from a 2004 edition of Southern Living, and while it’s not low-calorie by any means, if you limit yourself to a small slice, you won’t burst your waist buttons. And they make such a lovely small gift that anyone would be happy to receive one. I bought these disposable tins at the grocery store and they were perfect for individual cakes.


I frosted them right in the pans, which came with a clear, plastic lid that didn’t smush the frosting, and made it easy to deliver them to neighbors.

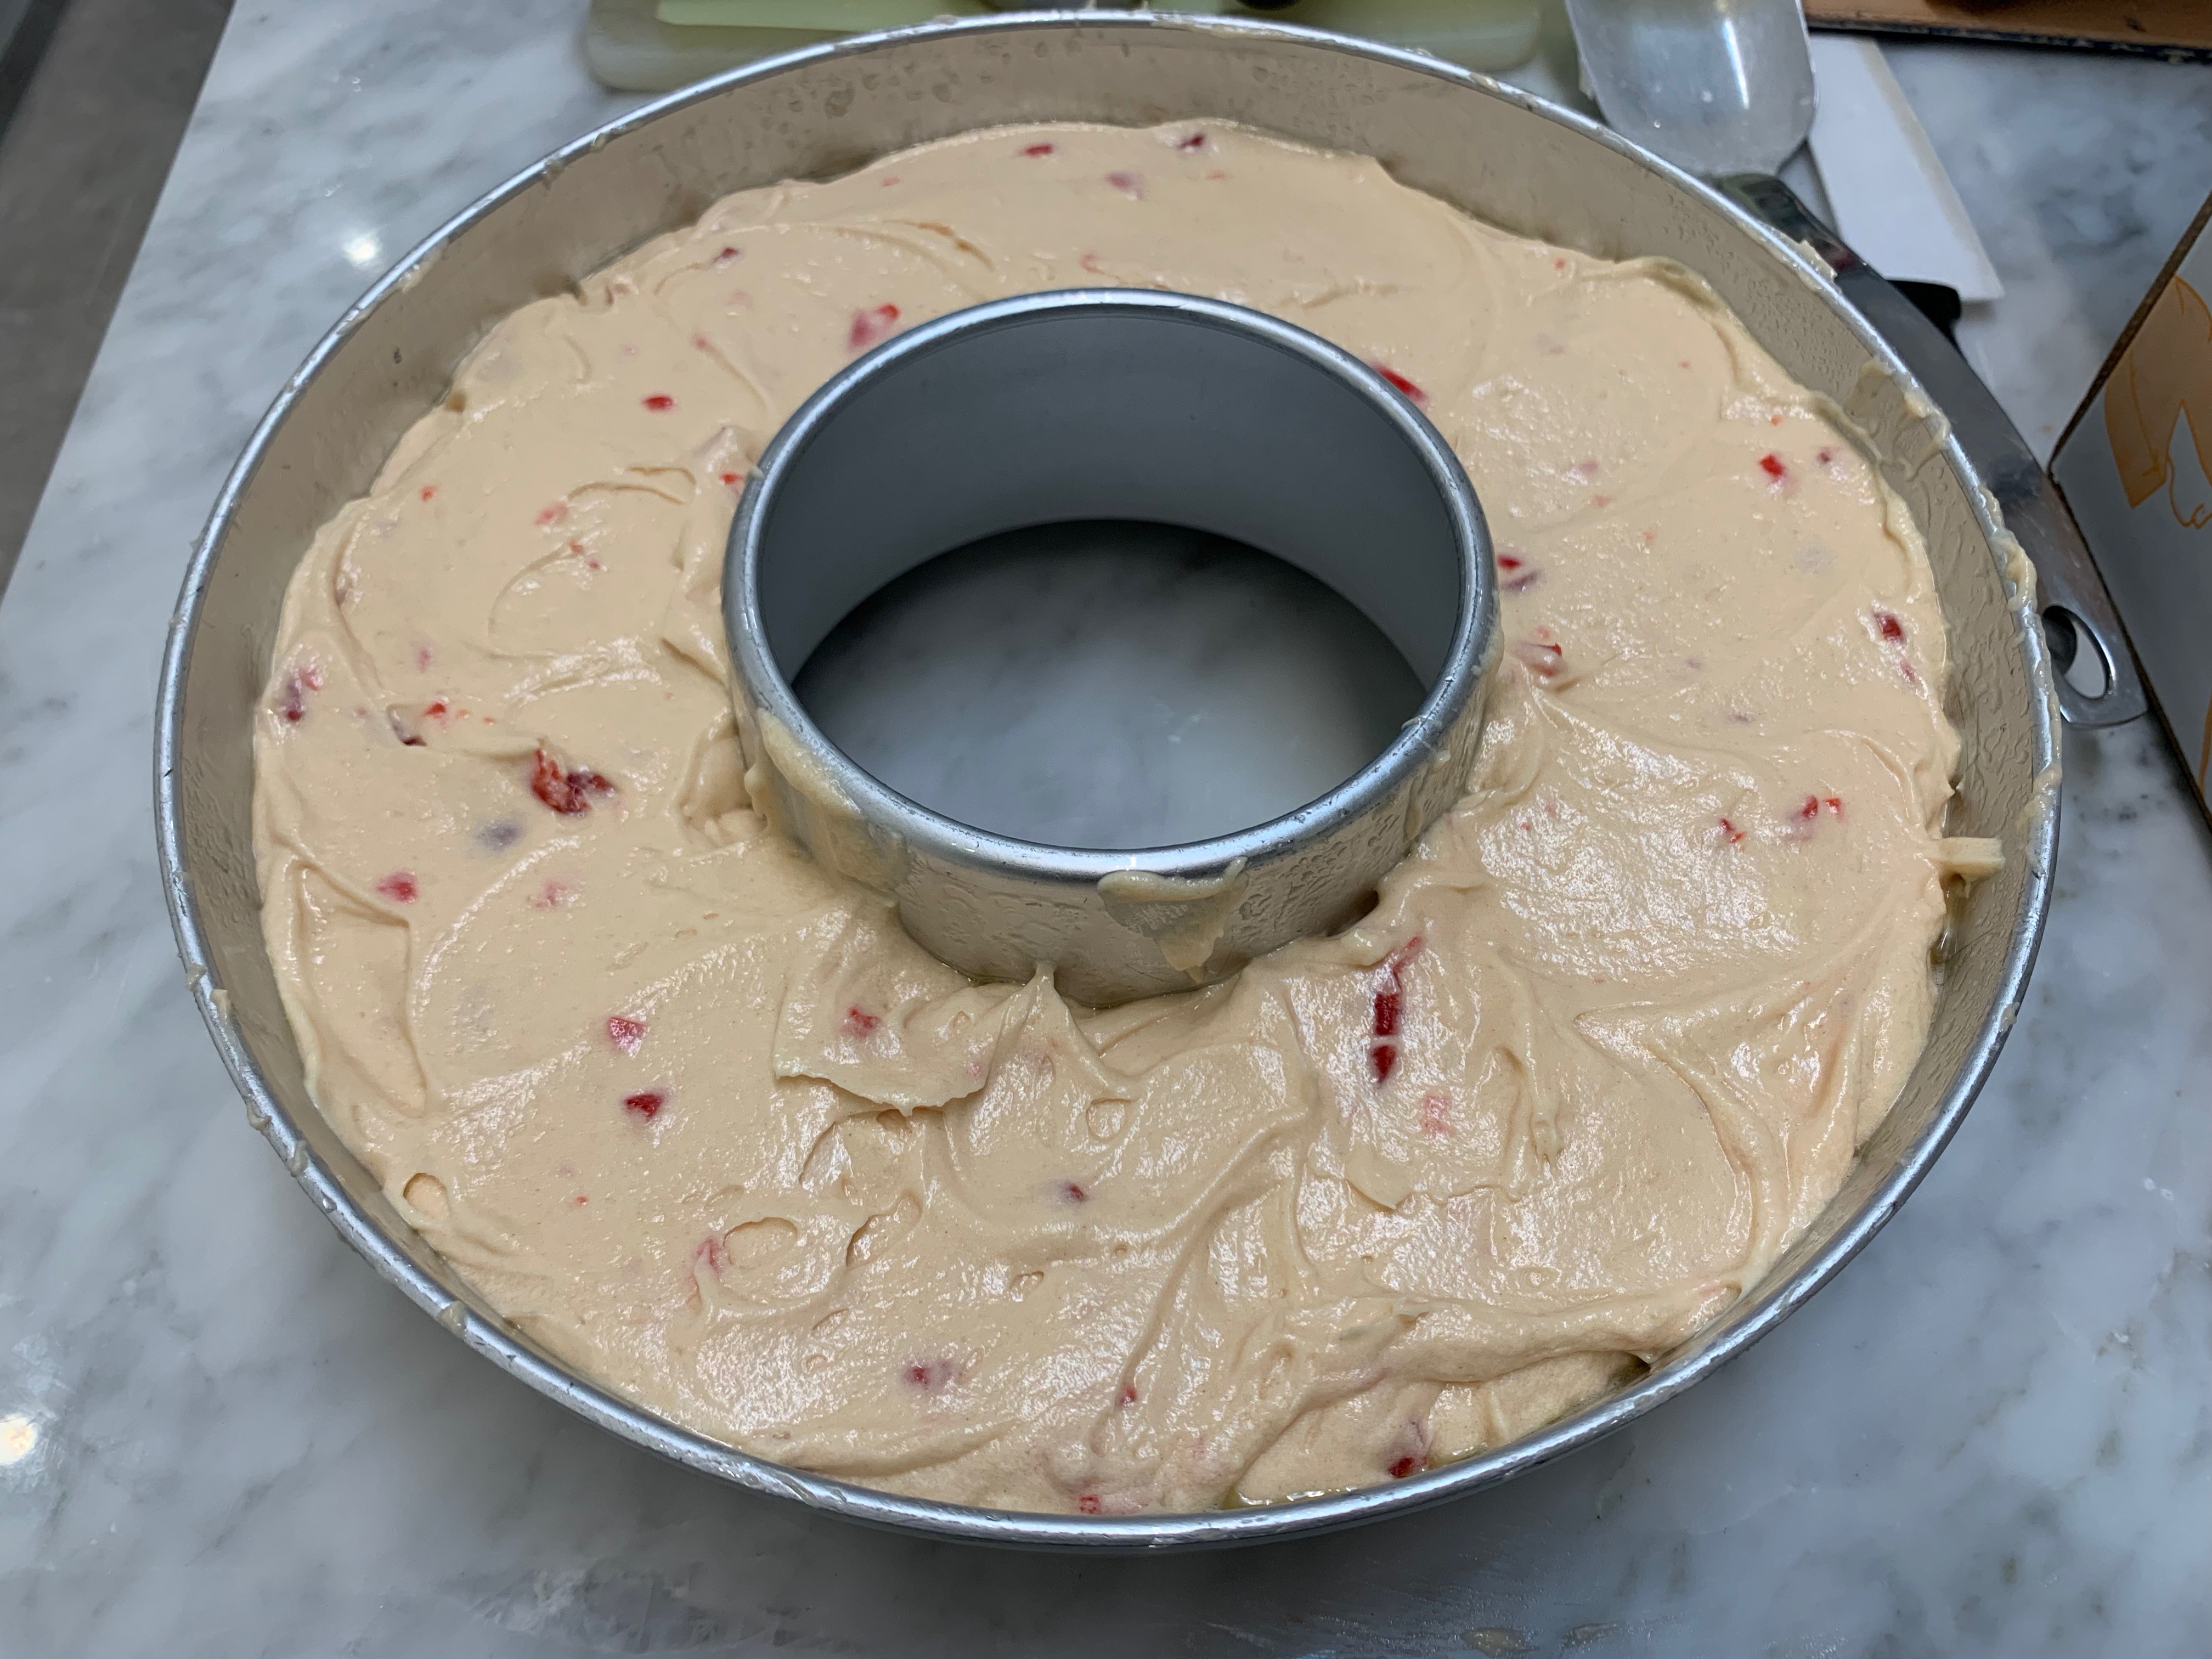
But for a large crowd, bake the cake in a tube pan.

I froze mine, frosting and all, and will remove it from the freezer hours ahead of serving it. I already tested freezing and thawing a mini cake, and that worked well, so I am confident that when we sit down to slice into this beauty on Christmas eve, it will taste as fresh as when I baked it. The holly leaves and berries (made from purchased marzipan and a squirt or two of food coloring) aren’t necessary, but they do say “Merry Christmas” in a most festive way, don’t you think? I hope you and your loved ones have a wonderful Christmas and that the Covid menace doesn’t find its way to your house.

Click here to connect with me on Instagram and find out what’s cooking in Ciao Chow Linda’s kitchen each day (and more).

Mini Cherry Pound Cakes
Ingredients
  • 1 10-ounce jar maraschino cherries (or use a 16 ounce jar for more cherries)
  • 3/4 cup butter
  • 3/4 cup shortening
  • 3 cups sugar
  • FOR THE CAKE:
  • 6 large eggs
  • 3 1/4 cups all-purpose flour
  • 1/8 teaspoon salt
  • 1 cup milk
  • 1 teaspoon almond extract
  • 1 teaspoon vanilla extract
  • FOR THE CHERRY GLAZE:
  • 1/4 cup butter, softened
  • 1 ( 3-ounce ) package cream cheese, softened
  • 2 cups powdered sugar
  • 3 tablespoons milk
  • 1 teaspoons vanilla extract
  • 1/4 cup cherries
  • FOR THE DECORATION:
  • 1 tube marzipan
  • food coloring
Instructions
  1. Drain jar of cherries, discarding juice.
  2. Chop cherries, and set aside.
  3. Beat butter and shortening at medium speed with an electric mixer until creamy.
  4. Gradually add sugar, beating 1 minute.
  5. Add eggs, 1 at a time, beating just until yellow disappears.
  6. Combine flour and salt; gradually add to butter mixture alternately with milk, beginning and ending with flour mixture.
  7. Beat at low speed just until blended.
  8. Stir in flavorings and 1/2 cup chopped cherries.
  9. Spoon batter into 7 greased and floured 5 3/4” x 3″ mini loaf pans. (I used PAM and it worked just fine.)
  10. If using one large tube pan, grease and flour that.
  11. Bake at 300 degrees for 55 minutes (both the minis and the large cake need this time) or until a wooden pick inserted in center comes out almost clean.
  12. Cool in pans on wire racks 10 minutes.
  13. Remove cakes from pans, and place on wire racks set over wax paper.
  14. To make the glaze:
  15. Beat butter and cream cheese at medium speed until creamy.
  16. Gradually add powdered sugar and milk; beat until smooth.
  17. Stir in vanilla and cherries.
  18. Drizzle Cherry Glaze over slightly warm cakes.
  19. Decorate with marzipan leaves and berries, if desired
  20. Refrigerate cakes to let glaze harden before wrapping.
  21. TO MAKE MARZIPAN LEAVES:
  22. Place a few tablespoons of marzipan in a small bowl and mix in some food coloring.
  23. Blend with a spoon until the color is uniform.
  24. Shape into leaves by hand, or with a small cookie cutter.
  25. Make berries by rolling little balls in your hand.


Monday, December 13, 2021

Chocolate Rugelach

Have you been baking cookies this holiday season? Although these rugelach, originally from the Jewish community of  Poland, were never part of my Christmas cookie traditions growing up, they’ve been a favorite of mine for decades. I finally got around to making them this year, and they are melt-in-your-mouth delicious. I’m going to have to tuck these away in the freezer or I’ll eat the whole batch before company arrives for the Christmas holiday.  I followed the basic dough recipe from Ina Garten, but instead of using the traditional raisins, jam and nuts filling, I opted for a chocolate filling. I also lowered the temperature to 325 degrees, and kept them in a little longer, since at 350 degrees, some of the interior dough wasn’t thoroughly cooked.

After chilling the dough, quarter it and then roll each quarter to a circumference of about 9 or 10 inches. Spread the chocolate filling all around, cut into triangles, then roll up each triangle, starting from the wide end. Place the rolled cookies on a parchment-lined cookie sheet, then brush with some beaten egg, and sprinkle with a little bit of sugar and a pinch of cinnamon.Bake for about 20 minutes at 325 degrees F., or until lightly golden. Let them cool, then sprinkle with a little powdered sugar (optional) and enjoy.

Click here to connect with me on Instagram and find out what’s cooking in Ciao Chow Linda’s kitchen each day (and more).

Chocolate Rugelach
Ingredients
  • FOR THE DOUGH:
  • 8 ounces cream cheese, at room temperature
  • 1/2-pound unsalted butter, at room temperature
  • 1/4 cup granulated sugar plus 9 tablespoons
  • 1/4 teaspoon kosher salt
  • 1 teaspoon pure vanilla extract
  • 2 cups all-purpose flour
  • CHOCOLATE FILLING
  • 8 oz semisweet chocolate
  • ¼ cup brown sugar
  • ¼ ground cinnamon optional
  • ⅛ teaspoon salt
  • FOR THE TOPPING:
  • an egg, lightly beaten with a teaspoon of water, to brush on top
  • 1/4 cup granulated sugar
  • a pinch of cinnamon
Instructions
  1. Preheat oven to 325 degrees F.
  2. Cream the cheese and butter in the bowl of an electric mixer fitted with the paddle attachment until light.
  3. Add 1/4 cup granulated sugar, the salt, and vanilla.
  4. With the mixer on low speed, add the flour and mix until just combined.
  5. Dump the dough out onto a well-floured board and roll it into a ball.
  6. Cut the ball in quarters, wrap each piece in plastic, and refrigerate for 1 hour.
  7. While the dough is chilling, melt the chocolate in a double boiler, then stir in the sugar, cinnamon and salt and mix well.
  8. On a well-floured board, roll each ball of dough into a 9 to 10-inch circle.
  9. Spread the dough with 1/4 of the chocolate mixture.
  10. Cut the circle into 16 equal wedges, cutting the whole circle in quarters, then each quarter into four pieces.
  11. Starting with the wide edge, roll up each wedge.
  12. Place the cookies on a baking sheet lined with parchment paper.
  13. Brush each cookie with the egg wash.
  14. Combine sugar and cinnamon and sprinkle on the cookies.
  15. Bake for about 20 minutes, until lightly browned.
  16. Remove to a wire rack and let cool.


Monday, December 6, 2021

Farro and Sausage Stuffed Acorn Squash


Fall is squash season, and although I love using all kinds of squash as side dishes, sometimes I let them take a starring role, as in this stuffed acorn squash recipe that makes a great main dish. I love a good bread or rice stuffing, but wanted to give farro a try this time, adding some sausage to give it a little extra oomph. If you’re a vegetarian, you could easily omit the sausage and it would still taste delicious. The recipe contains a number of steps, but if you plan well, you can make it all ahead of time and place it in the oven just before dinner. Start by roasting the squash in the oven, let it cool slightly, then scoop out the cooked squash.

Cut the squash into large chunks.

Add the chunks of squash to the cooked farro, sausage and cheeses.

Spoon the stuffing back into the squash.Sprinkle grated mozzarella on top. If you have more stuffing than will fit into the two halves (and most likely you will), butter a small casserole and place the stuffing inside.

Bake for about a half hour, then turn on the broiler for a few minutes to brown the top nicely. Be careful, it will burn easily!

Click here to connect with me on Instagram and find out what’s cooking in Ciao Chow Linda’s kitchen each day (and more).

Farro and Sausage Stuffed Acorn Squash
Author: Ciao Chow Linda
Ingredients
  • 1 large acorn squash
  • salt, pepper
  • a few tablespoons of olive oil
  • 2 links Italian sausage
  • 1/4 cup onion, minced
  • 1 stalk of celery, minced
  • 1/2 cup farro
  • 1 cup water
  • 1 egg, beaten lightly
  • 1/2 cup grated parmesan cheese
  • 1 cup shredded mozzarella cheese
  • a couple of leaves of minced fresh sage
  • a small amount of minced parsley
Instructions
  1. Cut the squash in half, remove the seeds, rub the cut ends with olive oil, and sprinkle with salt and pepper.
  2. Place in a 350 degree oven, covered with aluminum foil and bake for about 45 minutes to an hour or until tender.
  3. Let the squash cool.
  4. Bring the water to a boil, add the farro and a pinch of salt.
  5. Cover with a lid, and let simmer on low heat for about 20-25 minutes or until all the water is absorbed.
  6. Let the farro come to room temperature.
  7. Take the casings off the sausage and break up the sausage into bits, cooking in a couple of tablespoons of olive oil.
  8. Add the minced onion and minced celery, and cook until softened,
  9. Scrape the cooked squash from the interior of the squash, cutting into large pieces.
  10. To the cooked and cooled farro, add the squash, the cooked sausage, onion and celery, the beaten egg, the parmesan cheese and most of the mozzarella cheese, keeping some aside to sprinkle on top. Season with salt, pepper and the minced parsley.
  11. Mix thoroughly, then stuff back into the squash.
  12. You will have more than will fit into the squash, so butter a small casserole and place the remaining stuffing inside,
  13. Sprinkle more mozzarella cheese on top.
  14. Bake in a 375 degree oven for 30 minutes.
  15. At the end of 30 minutes, turn on the broiler for a few minutes to allow for greater browning on top, but keep an eye on it since it can burn easily,.


Sunday, November 21, 2021

Apple Streusel Pie

I don’t care if it’s two-crusted or streusel-topped, but I’m a big fan of apple pie. But it’s much easier to make this streusel topping than tackle two crusts, and with so much to do for the Thanksgiving meal, why not save yourself some time?  The crumb topping gives this dessert extra crunch, especially with the addition of some walnuts. Use your favorite pie crust recipe, or buy one already packaged, like I did this time, with one from Trader Joe’s. Roll it out, place it into your pie plate and crimp the edges. I sprayed my pie plate first with some PAM, to ensure easier removal of the slices. Prick the pastry all over, then put it in the refrigerator for at least 15 minutes before baking.
Weigh down the crust with some pie weights that are nestled on a piece of aluminum foil. I also sprayed the bottom of the foil with some PAM, so it wouldn’t stick to the crust. If you don’t have pie weights, use some hard beans, like I did. I keep reusing mine year after year and I think they’re at least 30 years old by now — and still have more life in them.

I like to cook the apples a bit before putting them in the crust. Otherwise, the pie has a tendency to sink a lot — especially important if you’re making a double crust pie and don’t want a big gap between the apples and the crust. Just cook them a little, so they still maintain their integrity as slices. You don’t want them turning into applesauce!

After you’re prebaked the pie shell a little bit, gently place the partially cooked apples inside, cover with the streusel topping and bake.

If the edges seem to be browning too quickly, cover them with strips of aluminum foil.

Let the pie rest at least a couple of hours before digging in.

And don’t forget that it tastes even better with a scoop of good vanilla ice cream!

Click here to find the recipe for this other great apple pie – an upside-down apple pie with a gooey pecan topping.

[October20097063.jpg]

Click here to connect with me on Instagram and find out what’s cooking in Ciao Chow Linda’s kitchen each day (and more).

Apple Streusel Pie
Author: Ciao Chow Linda
Ingredients
  • 1 purchased pie crust or your favorite home made pie crust
  • 7-8 apples, peeled and sliced evenly (about 9-10 cups of sliced apples)
  • (I used a combination of mostly Honey Crisps and Granny Smiths)
  • 4 tablespoons butter
  • 1/2 cup sugar
  • 1/4 teaspoon cinnamon
  • a pinch of cloves
  • a few gratings of fresh nutmeg
  • a pinch of salt
  • 2 T. lemon juice
  • 2 T. cornstarch
  • FOR THE TOPPING:
  • 1/2 cup butter
  • 1 cup flour
  • 2/3 cup brown sugar
  • 3/4 cup chopped walnuts
  • a pinch of cinnamon
Instructions
  1. FOR THE PIECRUST:
  2. I rolled out the pie crust and placed it gently in a pie plate that was sprayed with PAM.
  3. Then, I crimped the outer edge and pricked the bottom with a fork.
  4. I preheated the oven to 375 degrees F. and placed the uncooked pie crust in the refrigerator while the oven was preheating.
  5. When the oven reaches 375 degrees, place a buttered piece of aluminum foil in the pie shell, and weigh it down with pie weights or beans.
  6. Place in the oven and bake for 10 minutes.
  7. Remove from the oven, remove the pie weights and aluminum foil and bake the crust for another 10 minutes.
  8. FOR THE PIE FILLING:
  9. Peel, core and slice the apples into slices about 1/4 inch thick.
  10. Place the butter in a large skillet, big enough to hold all the apple slices.
  11. Cook the apple slices in the butter on a gentle heat for about 10 minutes or until they start to soften,
  12. Do not cook completely. They will continue to cook in the oven.
  13. When they begin to soften, turn off the heat and stir in the spices, the salt and the cornstarch.
  14. Spoon all the apples into the prebaked pie crust, then cover with the streusel topping and bake in a 375 degree oven for 25 minutes.
  15. Check the pie to make sure it isn’t browning too much on the edges and bake for another 5-10 minutes, placing aluminum foil strips around the edges if it’s getting too browned.
  16. STREUSEL TOPPING:
  17. Mix the flour, brown sugar, walnuts and cinnamon together, then using your fingers, blend in the butter.
  18. Carefully spread the topping over the apples and bake as directed above,


Thursday, November 4, 2021

Pumpkin (or Squash) Sformato


I know Thanksgiving is all about the turkey here in the U.S., but if you serve this squash sformato to your guests, the turkey might develop an inferiority complex. Everyone will want seconds of this intensely flavored dish that just melts in your mouth. It also makes a nice first course for a dinner party too, since you can make practically all of it ahead of time and just reheat in the microwave.

You can make a sformato from nearly any vegetable, including cauliflower, which I posted about here way back in 2009, served with a tomato sauce. But you can make it with carrots, spinach, broccoli, and even ricotta can be used to make this unctuous dish that is almost like eating glamorized baby food.

It’s good all on its own, but if you dress it up with a creamy parmesan sauce and drizzle with balsamic, it’ll take you to Nirvana. Now is the time to bring out that aged balsamic vinegar that’s been saved for special occasions. But even if you don’t want to spring for the expensive stuff, just take some supermarket balsamic and reduce it to a syrupy liquid, or alternatively, buy some balsamic glaze.

Click here to connect with me on Instagram and find out what’s cooking in Ciao Chow Linda’s kitchen each day (and more).

Pumpkin (or Squash) Sformato
Author: Ciao Chow Linda
Ingredients
  • 1 medium size butternut squash (enough to produce about 4 cups cooked squash)
  • 1 3/4 cup milk or a combination of milk and cream
  • 1/2 stick unsalted butter, plus more for greasing molds
  • 1/4 cup flour plus 1 T.
  • pinch of freshly grated nutmeg
  • salt, white pepper, to taste
  • 3 eggs, lightly beaten
  • 1/2 cup grated parmesan cheese
  • FOR THE SAUCE:
  • 2 cups heavy cream, reduced a bit
  • 1/2 cup grated parmesan cheese
  • reduced balsamic vinegar, balsamic glaze, or aged balsamic vinegar if you want to be indulgent
Instructions
  1. Cut the squash in half and remove the seeds.
  2. Grease an oven-proof casserole or flat pan and place the squash on it, cut side down.
  3. Roast in the oven for 45 minuttes or until tender when pierced with a fork.
  4. Remove the cooked squash from the skin, then place it in a food processor and puree it until perfectly smooth.
  5. Place the squash into a colander lined with paper towels to absorb any remaining moisture.
  6. You can do this the night before.
  7. Butter eight 3/4 cup oven-proof custard cups or flan molds and preheat oven to 350 degrees.
  8. Heat the milk in a saucepan until warm and little bubble start to form.
  9. In another saucepan over low heat, melt the butter, then add the flour and stir and cook for a couple of minutes until smooth.
  10. It will start to get “pasty,” but that’s fine.
  11. Add the milk and continue to stir constantly, using either a whisk or wooden spoon, for about five minutes.
  12. Add seasonings and squash puree.
  13. Beat the eggs and add the parmesan cheese to the eggs.
  14. Add the puree mixture to the egg and cheese mixture, starting with a small amount, then increasing the amount a little at a time.
  15. By adding them slowly, you want to slowly raise the temperature of the eggs and cheese.
  16. If you add the pureed squash mixture all at once, you risk curdling the eggs.
  17. When everything is mixed, pour into the buttered molds and put the molds in a bain-marie or hot water bath.
  18. Bake for about 40 minutes.
  19. Remove the molds from the water and let them rest at least 10 minutes before trying to unmold.
  20. If you unmold too soon, they won’t hold their shape.
  21. They actually hold their shape better the next day when you reheat them.
  22. I microwaved them in their molds the next day to reheat, then flipped them out onto individual plates.
  23. Serve as is, or with a simple homemade parmesan cream sauce, as shown.
  24. TO MAKE THE SAUCE:
  25. Place the cream in a sauce pan and reduce a bit (not too much because when you add the cheese it will thicken more)
  26. Remove the pan from the heat and stir in the cheese, whisking to incorporate and make it smooth.
  27. Pour some of the sauce over the sformato and drizzle with balsamic, then fresh gratings of parmesan cheese.


Thursday, October 21, 2021

French Apple Almond Cake

Is it even Fall if you haven’t made an apple cake? There are so many recipes out there for apple cake that it was hard to choose, but any recipe that includes almonds and apples has my vote. I found this winner of a dessert on a website called The Sugar Hit and made it last year but never posted it. Hey, it’s time to make it again! 

I used a buttered springform pan, placing a piece of parchment paper on the bottom. I then layered some of the batter over the paper, and placed apples over the batter in a neat pattern. Repeat with the batter (don’t worry if you don’t get complete coverage), then more apples. When you’re finished with that layer, scatter the almonds and sugar topping all over, then bake. (I overbaked it by five minutes and the bottom layer was too browned.) Sprinkle with confectioner’s sugar when cooled. Enjoy with a cup of tea or coffee (and some vanilla sauce or ice cream wouldn’t hurt either).

Click here to connect with me on Instagram and find out what’s cooking in Ciao Chow Linda’s kitchen each day (and more).

French Apple Cake
Author: Ciao Chow Linda via The Sugar Hit
Ingredients
  • For the apples:
  • 3 medium granny smith apples (or whatever kind you like)
  • 1 tbsp caster sugar (for you Americans, use superfine granulated sugar)
  • pinch of cinnamon
  • 1 tsp rum
  • For the cake batter:
  • 1 + ½ sticks (150g) butter
  • ½ cup (110g) caster sugar (superfine granulated sugar to you Americans)
  • 2 eggs
  • 1¼ cups (185g) plain flour
  • ¾ cups (85g) almond meal
  • 1 tbsp baking powder
  • 2 tbsp rum
  • 1 tsp vanilla bean paste or extract
  • 1 tsp. almond extract
  • ¼ cup milk
  • ⅓ cup sliced almonds, mixed with sugar and cinnamon
Instructions
  1. Preheat the oven to 375F/180C and grease a 9 inch/22cm springform cake tin.
  2. Peel and core the apples, then quarter them and slice them into thickish pieces.
  3. Toss the pieces with the sugar, cinnamon and rum and set aside while you prepare the batter.
  4. Cream together the butter and sugar, until they are light and fluffy, then add the eggs and beat them in well.
  5. Add the remaining ingredients to the bowl and slowly mix or fold until everything is well combined. The batter will be very thick.
  6. Scrape 2 thirds of the batter into the greased cake tin, and spread it evenly over the base (it will seem like there’s not enough, but there is).
  7. Scatter most of the apples evenly over the cake mix, leaving enough slices for a second layer.
  8. Then dollop over the remaining batter and spread carefully over the apples.
  9. Add the rest of the apples, arranging the slices in a concentric circle.
  10. Scatter over the chopped almonds and sprinkle with the cinnamon sugar.
  11. Bake for 40-45 minutes or until a skewer inserted comes out without any raw batter clinging to it.
  12. Leave to cool for at least 10 minutes in the tin, before carefully unmolding it and scattering over a little sugar to decorate. This is best served warm.


Monday, October 11, 2021

Roasted carrots with salsa verde

Carrots are almost always the “understudy,” but they’ll take a starring role when you make this simple recipe. They’re so easy to roast in the oven, and with a simple salsa verde, these beauties are elevated to dinner party status. I love them equally well whether they’re warm from the oven, or served at room temperature, making them perfect as do-ahead veggies when guests are expected. Try to find these multi-colored carrots with the tops still attached. They make for a much prettier presentation.

Roasted carrots with salsa verde
Author: Ciao Chow Linda
Ingredients
  • 1 bunch of carrots (preferably multi-colored) with the stems intact
  • olive oil to drizzle
  • seasoned or herbed salt (preferably homemade)
  • freshly ground black pepper
  • FOR THE SALSA VERDE:
  • 1/4 cup olive oil
  • a handful of minced parsley
  • one large garlic clove, minced
  • 1 tablespoon capers
  • coarse sea salt
Instructions
  1. Trim the carrots, leaving a bit of green stem at the top.
  2. Wash the carrots well, but do not peel.
  3. Cut the carrots in half, lengthwise.
  4. If they are especially large, you may want to cut them in half again.
  5. Place the carrots in a roasting pan and drizzle with olive oil.
  6. Toss the carrots in the pan to make sure they are evenly coated.
  7. Sprinkle with the seasoned salt and black pepper.
  8. Roast in a preheated 425 degree oven for 20-30 minutes, or until you can pierce the carrots easily with a fork.
  9. Remove from the oven and either pour the salsa verde over them and serve immediately, or at room temperature.
  10. FOR THE SALSA VERDE:
  11. Mince the parsley finely, adding the garlic, capers and sea salt while you are mincing with a sharp knife.
  12. Add the olive oil to the minced ingredients and pour over the carrots.

Click here to connect with me on Instagram and find out what’s cooking in Ciao Chow Linda’s kitchen each day (and more).

Monday, September 27, 2021

Pork Loin Stuffed with Capocollo and Provolone Cheese


Now that we’re moving away from summer temperatures and outdoor barbecues, it’s time to fire up the oven for a nice Sunday roast. This stuffed pork loin really ticks all the boxes — it’s easy to prepare, tastes great and serves at least six to eight people — even though it weighs only two and a half to three pounds. Start out with a pork loin — not a tenderloin, which is smaller and even more tender — but a pork loin. It will become just as tender as a tenderloin with the low and slow oven temperature included in the instructions below. First, you’re going to need to open it to stuff it, so take a sharp knife and cut into it lengthwise, stopping before you reach the bottom.

Keep opening the roast, kind of like a roll, slicing lengthwise the whole way around until you have a pretty even thickness throughout.

I tenderized the meat with a meat pounder, flattening it a bit more, then sprinkled throughout with homemade seasoned salt and black pepper.

Layer on thin slices of capocollo. In this case, I used a spicy version of capocollo to impart a little more flavor to the meat as the fat melts inside.

Layer slices of provolone cheese over the capocollo, and roll up the pork loin.

Then tie it securely with butcher’s twine, sprinkle with more seasoned salt, black pepper and paprika and insert some rosemary and sage into the twine.

Roast it in a slow oven for 1 1/2 to 2 hours, or until a meat thermometer reads 125 to 130 degrees F. The slow cooking will ensure you have tender slices of meat when you slice into it. Add some potatoes and onions smeared with olive oil and seasonings alongside the roast, but after you remove the roast, and while it’s resting on a cutting board, kick up the temperature to 450 degrees to let the vegetables get nicely browned.

If you want the outside fat on the roast to be crispier, just add a little olive oil to a skillet, turn the heat to high and sear the cooked roast on top. I didn’t do this extra step, but my roast didn’t have much fat on top either.

Make sure to let the roast rest at least fifteen minutes before slicing into it, so the juices don’t all come gushing out. It will also help to keep the filling intact too, once you slice into it.

As I said, the roast serves a lot of people, and we had enough leftovers for a great lunch the next day. Take a crusty roll and add a slice or two of the roast, some roasted red peppers, cooked broccoli rabe, and some melted provolone cheese. It’s worth making this recipe just to have these delicious sandwiches the next day.

Nerd Notes: If you’re confused about the names — is it capocollo, capicola or coppa? click here for a terrific explanation about these cured meat from DiBruno Brothers, one of my favorite shops in Philadelphia’s old Italian Market.

Click here to connect with me on Instagram and find out what’s cooking in Ciao Chow Linda’s kitchen each day (and more).

Pork Loin Stuffed with Capocollo and Provolone Cheese
Author: Ciao Chow Linda
Ingredients
  • 1 two and a half to three pound pork loin (NOT tenderloin)
  • 1/4 pound spicy capocollo
  • 1/4 pound provolone cheese
  • seasoned salt
  • black pepper
  • paprika
  • rosemary sprigs
  • sage sprigs
  • olive oil to coat pan.
Instructions
  1. Dry the pork loin with paper towels.
  2. Take a sharp knife and slice it lengthwise, avoiding going all the way through.
  3. Keep rolling the pork over, continuing to slice open the entire length, as if you’re opening a book.
  4. Pound the roast with a meat pounder to tenderize, then sprinkle with seasoned salt and black pepper.
  5. Lay tthe slices of capocollo over the roast, then layer over the cheese.
  6. Roll it up tightly, making sure to end up with the fat layer of the roast on top.
  7. Secure it with butcher’s twine.
  8. Season the outside with the seasoned salt, black pepper, and paprika, then insert rosemary and sage leaves into the twine.
  9. Roast for 1 1/2 to two hours at 275 degrees F. or until a meat thermometer registers 125 to 130 degrees.
  10. Remove from the oven and let it rest at least 15 minutes or as long as 1/2 hour.
  11. Remove the twine, slice and serve.


Monday, September 13, 2021

Plum Almond Cake


I’ve been making the well-known plum cake from Marian Burros and the New York Times for years, but recently decided to try a similar one in Domenica Marchetti’s cookbook “Rustic Italian.” Her recipes are always winners and this was no exception. It incorporates a little almond flour in addition to all-purpose flour, but what really sets this apart is the sugary-almond topping nestled over the plums. The crunchy coating takes it over the top, although it loses its crispness when it sits overnight. No problem, because it’s so delicious, you’re not likely to have any leftovers the next day.

It uses Italian prune plums, and although Domenica’s recipe calls for nine of them, mine were smaller and I needed a lot more to fill the pan. It’s a cinch to remove the pits. Just slice down the middle, twist each half in the opposite direction, and pull out the pit. Lay the plums over the batter cut side up.

Top with the almond-butter-sugar coating and bake.The crumb is really tender, the fruit is jammy and the topping is sugary and irresistible. I don’t know what took me so long to make this cake, but it’s now at the top of my list when I have a hankering for a slice of cake. I think this would taste great with apricots, peaches or other fruits too when Italian prune plums are hard to find. Grazie mille, cara Domenica.

Click here to connect with me on Instagram and find out what’s cooking in Ciao Chow Linda’s kitchen each day (and more).

Plum Almond Cake
Author: Ciao Chow Linda via Domenica Marchetti
Ingredients
  • 1/2 cup sunflower or vegetable oil, plus more for greasing
  • 1 cup unbleached all-purpose flour, plus more for dusting
  • 1/2 cup almond meal or almond flour
  • 2 teaspoons baking powder
  • 1/4 teaspoon fine sea salt
  • 1 large egg
  • 1/2 cup half and half or whole milk
  • finely grated zest and juice of 1 large lemon
  • 1 cup sugar, plus 2 tablespoons
  • 1/4 teaspoon pure almond extract
  • 9 Italian plums, halved and pitted (or more if they’re small)
  • 1/4 cup sliced almonds
  • 2 tablespoons unsalted butter, at room temperature
Instructions
  1. Preheat the oven to 375 degrees F. Lightly oil an 8-inch springform pan. Dust tthe pan with flour and tap out the excess.
  2. In a large bowl, whisk together the flour, almond meal, baking powder and salt.
  3. In a separate bowl, combine the oil, egg, half and half (or milk), lemon juice and zest, the 1 cup sugar, and almond extract.
  4. Whisk to blend thoroughly.
  5. Add the wet ingredients to the flour mixture and whisk until just combined.
  6. Pour the batter into tthe prepared pan.
  7. Arrange the plum halves, cut side up, on top of the batter.
  8. In a bowl, combine the almonds, the 2 tablespoons sugar and the butter and mix well.
  9. Dot the almond topping over the cake.
  10. Bake until the topping is golden brown and a cake tester inserted into the center of the cake comes out clean, about 45 minutes.
  11. Transfer to a wire rack and let cool for 20 minutes.
  12. Remove the ring from the pan and place the cake on a serving platter.
  13. Cut into wedges and serve warm or at room temperature.


Monday, September 6, 2021

Cherry Tomato Focaccia


Summer is winding down here in the Northeast U.S., but I’ve still got plenty of teensy cherry tomatoes ripening on the vine in my garden. These mini cherry tomatoes are perfect atop a focaccia, although you could certainly use regular-sized cherry tomatoes instead. The basic no-knead focaccia recipe comes from Bon Appetit, and I added the tomatoes and rosemary. Feel free to try other herbs, such as thyme or oregano if rosemary isn’t to your liking.

The hardest part of this recipe is stretching the dough across the pan. It keeps wanting to spring back, but be persistent and keep pressing and stretching until it reaches all the edges. (NOT TRUE – SEE UPDATE BELOW)

UPDATE: Let the dough rise a second time in the pan BEFORE trying to stretch it out. It works much much better that way. This is a photo of the dough when I tried to stretch it out before letting it rise a second time. It worked, but it’s much better to let the blob of dough sit in the pan to rise a second time before pressing it out.

This is a photo of the dough after it had risen a second time. Only then, did I try to stretch it while in the pan, and it had already stretched nearly to all the edges by itself. After it had risen, and I stretched it the rest of the way into the corners of the pan, I dimpled it with fingers that were wet with a little olive oil.

Then I scattered the tomatoes, minced rosemary and kosher salt on top, with another little drizzle of olive oil. 

Bake it in a 450 degree F. oven for about 20 minutes to a half hour, or until lightly golden.The recipe makes enough for a crowd, so if you can’t eat it all the same day it’s baked, it’s best to freeze the leftovers and reheat another day.Bon Appetit’s recipe calls for a brush of melted butter on top, but I prefer to drizzle with a bit more olive oil and sea salt, Pour yourself a nice drink, and enjoy a slice of this focaccia as a perfect accompaniment.

Click here to connect with me on Instagram and find out what’s cooking in Ciao Chow Linda’s kitchen each day (and more).

Cherry Tomato Focaccia
Author: Ciao Chow Linda
Ingredients
  • 1 ¼-oz. envelope active dry yeast (about 2¼ tsp.)
  • 2 tsp. honey
  • 5 cups (625 g) all-purpose flour
  • 5 tsp. Diamond Crystal or 1 Tbsp. Morton kosher salt
  • 6 Tbsp. extra-virgin olive oil, divided, plus more for hands
  • a bunch of cherry tomatoes
  • butter to grease the pan
  • Flaky sea salt
  • minced fresh rosemary
Instructions
  1. Whisk one ¼-oz. envelope active dry yeast (about 2¼ tsp.), 2 tsp. honey, and 2½ cups lukewarm water in a medium bowl and let sit 5 minutes (it should foam or at least get creamy; if it doesn’t your yeast is dead and you should start again—check the expiration date!).
  2. Start adding the flour and salt, but add only four cups flour at first and mix. Add more flour if needed. What you want is a shaggy dough with no dry streaks of flour.
  3. Pour 4 Tbsp. extra-virgin olive oil into a big bowl that will fit in your refrigerator.
  4. Transfer dough to bowl and turn to coat in oil.
  5. Cover with a silicone lid or plastic wrap and chill until dough is doubled in size (it should look very bubbly and alive), at least 8 hours and up to 1 day.
  6. If you’re in a rush, you can also let it rise at room temperature until doubled in size, 3–4 hours.
  7. After the dough has risen double in size, use a silicone spatula, gather up edges of dough farthest from you and lift up and over into center of bowl.
  8. Give the bowl a quarter turn and repeat process.
  9. You want to deflate dough while you form it into a rough ball.
  10. Generously butter a 13×9″ baking pan, for thicker focaccia that’s perfect for sandwiches, or an 18×13″ rimmed baking sheet, for focaccia that’s thinner, crispier, and great for snacking.
  11. The butter may seem superfluous, but it’ll ensure that your focaccia doesn’t stick.
  12. Pour 1 Tbsp. extra-virgin olive oil into center of pan.
  13. Dump the dough to the center of the prepared pan.
  14. If you try to stretch it out right away to the corners of the pan, it will be difficult.
  15. Wait ten or fifteen minutes, then stretch out the dough. It will be much easier.
  16. Pour any oil left from the bowl over and turn dough to coat it in oil.
  17. Let rise a second time, uncovered in the baking sheet, in a dry, warm spot (like near a radiator or on top of the fridge or a preheating oven) until doubled in size, at least 1½ hours and up to 4 hours.
  18. Place a rack in middle of oven; preheat to 450°.
  19. To see if the dough is ready, poke it with your finger. It should spring back slowly, leaving a small visible indentation.
  20. If it springs back quickly, the dough isn’t ready. (If at this point the dough is ready to bake but you aren’t, you can chill it up to 1 hour.)
  21. Lightly oil your hands. If using a rimmed baking sheet, gently stretch out dough to fill.
  22. Dimple focaccia all over with your fingers, creating very deep depressions in the dough (reach your fingers all the way to the bottom of the pan).
  23. Place cherry tomatoes throughout the focaccia, pushing them down into the dough,
  24. Drizzle with remaining 1 Tbsp. extra-virgin olive oil and sprinkle with flaky sea salt and the minced rosemary.
  25. Bake focaccia until puffed and golden brown all over, 20–30 minutes.
  26. Drizzle with more olive oil and additional salt if needed.
  27. Focaccia is best eaten the day it’s made, but keeps well in the freezer.
  28. Slice it into pieces, store it in a freezer-safe container, then reheat it on a baking sheet in a 300° F oven.

Saturday, August 28, 2021

Grilled Codfish with Cherry Tomatoes


I’ve got a gazillion cherry tomatoes ripening on the vine and looking for a home. This recipe, adapted from my blogging buddy, Stacey, is the perfect place for these teensy tomatoes that are no larger than a small sourball candy. You probably won’t be able to find them this tiny, but regular-sized cherry or grape tomatoes work fine here too. Everything gets placed in a disposable aluminum pan and cooked on a hot grill, keeping your kitchen cool on a hot summer’s day. In 15 minutes, dinner is ready, and you don’t have to flip the fish at all if you keep the lid down on the grill. 

You needn’t limit yourself to cod either. Try it with flounder, snapper or halibut, for example, but depending on the thickness of the fish, you may have to cook it a shorter or longer time on the grill.

There is a lot of delicious sauce that oozes forth from the tomatoes and other ingredients, so serve it over rice, polenta or pasta to soak up all those juices.

Since I was heavy-handed with the tomatoes, there were a lot left over, after we had eaten all the fish. I saved a little of the rice and green beans also, and the next day had a delicious lunch heated up in the microwave.

Click here to connect with me on Instagram and find out what’s cooking in Ciao Chow Linda’s kitchen each day (and more).

Codfish with Cherry Tomatoes on the Grill
Author: Ciao Chow Linda
Ingredients
  • 1 lb. codfish
  • whole cherry tomatoes (I didn’t measure but there were at least two cups – use as many as you like)
  • 3 anchovies (anchovy haters – please don’t ignore these – it won’t taste like anchovies, but adds a great “umami” flavor)
  • 2 cloves garlic, chopped
  • 2 tbsp capers
  • 1 large shallot, sliced
  • 2 tbsp white wine vinegar
  • 4 tbsp olive oil
  • kosher salt & pepper
  • 1 lemon, half sliced and placed in pan, and half juiced and poured into the pan
  • 1 tablespoon butter
  • fresh oregano leaves
  • fresh basil leaves, minced
  • fresh parsley minced
Instructions
  1. Drizzle a little olive oil onto the bottom of a disposable aluminum pan.
  2. Add the codfish, seasoning with salt and pepper and then placing a pat of butter on top
  3. Pour the juice of half a lemon over the fish.
  4. Place the rest of the ingredients (except the basil and parsley) in the pan and toss lightly to coat everything.
  5. Cook on a hot grill with the lid closed for 15 minutes, (or longer if your fish is thicker and not cooked through)
  6. Sprinkle the cooked fish with the minced basil and parsley, and serve.


Saturday, August 21, 2021

Lemon Blueberry Pound Cake


I’ve been overdosing on blueberries lately. It all started while I was in London and walked by a fruit vendor on a corner selling crates of blueberries for the equivalent of $4 U.S. I hit the mother lode, so how could I resist?  The vendor dumped the blueberries out of the crate into a plastic shopping bag, and it was heavy – nearly the same weight as my one-month old granddaughter that I’d been visiting. On my 20 minute walk home, I had to continually shift the bag from my left hand to my right to keep my shoulder from hurting.

At a certain point, I cradled the bag of blueberries in my arms, which wouldn’t have been so bad except I was wearing a stark white shirt. You know where this is going. Fast forward to a spray I found in my daughter’s laundry room that miraculously took out the blueberry stains and returned my shirt to its virgin glory. I later found out later however, that it was bathroom cleaner with bleach, not a spot remover for clothes! Well, at least now I have another tool in my arsenal for removing stains.

But I digress — back to blueberries. I used them all up (finally) to bake three blueberry cakes, two pies and a dozen and a half muffins. The first cake I made was Ottolenghi’s well-known and delicious blueberry almond and lemon cake, which I’ve made many times and the recipe is here. I wanted to try a different recipe for the second go-round, and decided on a lemon blueberry pound cake from Once Upon a Cake.  I made it, but substituted one cup almond flour for half the regular flour. It was good but it didn’t rise enough to create the attractive domed center that I was looking for. Moreover, after we each had eaten a slice of the cake, Trevor the cat found it on the kitchen counter and helped himself to a big chunk, causing us to toss the remaining cake, and wreaking havoc in Trevor’s “plumbing." 

When I got back home to the U.S., I decided to bake Once Upon A Cake’s recipe a second time, but this time exactly as it was written, eliminating the almond flour. The result was a perfectly domed center and a delicious pound cake. I saved a few of the blueberries to cook down and tint the glaze, but you could keep the glaze white, or eliminate it entirely, dusting the top with only a sprinkling of powdered sugar.

Click here to connect with me on Instagram and find out what’s cooking in Ciao Chow Linda’s kitchen each day (and more).

Lemon Blueberry Pound Cake
Author: Ciao Chow Linda
Ingredients
  • 1/2 cup milk
  • 1 tablespoon grated lemon zest, packed
  • 2 tablespoons fresh lemon juice
  • 2 cups + 1 teaspoon all-purpose flour, spooned into measuring cup and leveled off with a knife
  • 1/4 teaspoon baking soda
  • 1/4 teaspoon salt
  • 1 cup blueberries (if using frozen blueberries, do not defrost)
  • 1 stick (1/2 cup) unsalted butter, softened
  • 1 1/4 cups gramulated sugar
  • 2 large eggs
  • FOR THE GLAZE:
  • about six blueberries
  • 2 tablespoons water
  • 1 cup confectioner’s sugar
  • freshly squeezed lemon juice, (about 1/2 lemon, or as much as needed to get the right consistency)
Instructions
  1. Preheat oven to 350 degrees Fahrenheit
  2. Adjust an oven rack to middle position.
  3. Butter and flour a 9 x 5 inch loaf pan, shaking out excess flour.
  4. (Or butter the pan and line with parchment paper, then spray with nonstick spray)
  5. In a small bowl, whisk together the milk, lemon zest, and lemon juice.
  6. Let it sit for at least 10 minutes while you proceed with the recipe.
  7. It will curdle, but that’s fine.
  8. In a medium bowl, whisk together 2 cups flour, baking soda and salt.
  9. In a small bowl, toss the blueberries with the remainign teaspoon of flour.
  10. Set both aside.
  11. In the bowl of an electric mixer fitted with the paddle attachment (or beaters), cream the butter and sugar on medium speed until light and fluffy, 2 to 3 minutes.
  12. Scrape down the sides of the bowl, then beat in the eggs one at a time, beating well after each addition.
  13. Scrape down the sides of the bowl again.
  14. With the mixer on low speed, beat in a third of the flour mixture, then half of the milk mixture.
  15. Beat in another third of the flour mixture, then the remaining milk mixture, followed by the remaining flour mixture, scraping the bowl as necessary.
  16. Add the flour-dusted blueberries to the batter and, using a spatula, fold until evenly combined.
  17. Transfer the batter into the prepared pan and smooth the top.
  18. Bake for 50 to 60 minutes, until the cake is golden brown and a tester comes out clean.
  19. Let the cake cool in the pan for about 10 minutes, then turn out onto a rack to cool completely.
  20. When the cake is cool, transfer to a serving platter.
  21. Make the glaze by cooking the six blueberries with the water, pressing down on the blueberries to release the color, and cooking for a couple of minutes.
  22. Strain the blueberries, retaining the liquid and tossing the squashed blueberries.
  23. Mix the liquid with the confectioner’s sugar, adding lemon juice if it’s too thick.
  24. It should be very thick, almost the consistency of molasses.
  25. Spread the glaze over the cake, allowing some to drip down the sides.