Monday, September 27, 2021

Pork Loin Stuffed with Capocollo and Provolone Cheese


Now that we’re moving away from summer temperatures and outdoor barbecues, it’s time to fire up the oven for a nice Sunday roast. This stuffed pork loin really ticks all the boxes — it’s easy to prepare, tastes great and serves at least six to eight people — even though it weighs only two and a half to three pounds. Start out with a pork loin — not a tenderloin, which is smaller and even more tender — but a pork loin. It will become just as tender as a tenderloin with the low and slow oven temperature included in the instructions below. First, you’re going to need to open it to stuff it, so take a sharp knife and cut into it lengthwise, stopping before you reach the bottom.

Keep opening the roast, kind of like a roll, slicing lengthwise the whole way around until you have a pretty even thickness throughout.

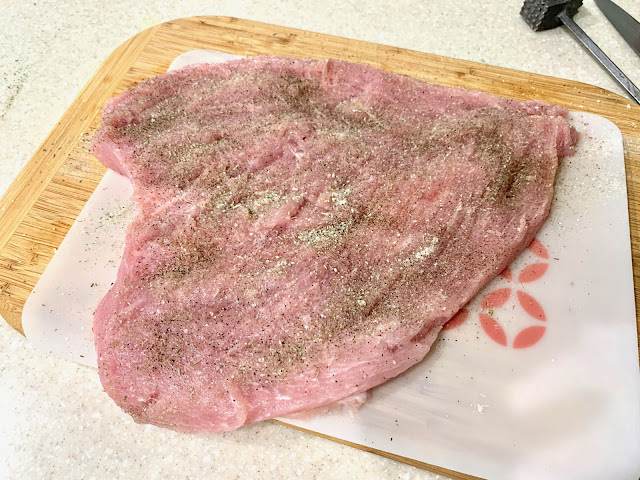
I tenderized the meat with a meat pounder, flattening it a bit more, then sprinkled throughout with homemade seasoned salt and black pepper.

Layer on thin slices of capocollo. In this case, I used a spicy version of capocollo to impart a little more flavor to the meat as the fat melts inside.

Layer slices of provolone cheese over the capocollo, and roll up the pork loin.

Then tie it securely with butcher’s twine, sprinkle with more seasoned salt, black pepper and paprika and insert some rosemary and sage into the twine.

Roast it in a slow oven for 1 1/2 to 2 hours, or until a meat thermometer reads 125 to 130 degrees F. The slow cooking will ensure you have tender slices of meat when you slice into it. Add some potatoes and onions smeared with olive oil and seasonings alongside the roast, but after you remove the roast, and while it’s resting on a cutting board, kick up the temperature to 450 degrees to let the vegetables get nicely browned.

If you want the outside fat on the roast to be crispier, just add a little olive oil to a skillet, turn the heat to high and sear the cooked roast on top. I didn’t do this extra step, but my roast didn’t have much fat on top either.

Make sure to let the roast rest at least fifteen minutes before slicing into it, so the juices don’t all come gushing out. It will also help to keep the filling intact too, once you slice into it.

As I said, the roast serves a lot of people, and we had enough leftovers for a great lunch the next day. Take a crusty roll and add a slice or two of the roast, some roasted red peppers, cooked broccoli rabe, and some melted provolone cheese. It’s worth making this recipe just to have these delicious sandwiches the next day.

Nerd Notes: If you’re confused about the names — is it capocollo, capicola or coppa? click here for a terrific explanation about these cured meat from DiBruno Brothers, one of my favorite shops in Philadelphia’s old Italian Market.

Click here to connect with me on Instagram and find out what’s cooking in Ciao Chow Linda’s kitchen each day (and more).

Pork Loin Stuffed with Capocollo and Provolone Cheese
Author: Ciao Chow Linda
Ingredients
  • 1 two and a half to three pound pork loin (NOT tenderloin)
  • 1/4 pound spicy capocollo
  • 1/4 pound provolone cheese
  • seasoned salt
  • black pepper
  • paprika
  • rosemary sprigs
  • sage sprigs
  • olive oil to coat pan.
Instructions
  1. Dry the pork loin with paper towels.
  2. Take a sharp knife and slice it lengthwise, avoiding going all the way through.
  3. Keep rolling the pork over, continuing to slice open the entire length, as if you’re opening a book.
  4. Pound the roast with a meat pounder to tenderize, then sprinkle with seasoned salt and black pepper.
  5. Lay tthe slices of capocollo over the roast, then layer over the cheese.
  6. Roll it up tightly, making sure to end up with the fat layer of the roast on top.
  7. Secure it with butcher’s twine.
  8. Season the outside with the seasoned salt, black pepper, and paprika, then insert rosemary and sage leaves into the twine.
  9. Roast for 1 1/2 to two hours at 275 degrees F. or until a meat thermometer registers 125 to 130 degrees.
  10. Remove from the oven and let it rest at least 15 minutes or as long as 1/2 hour.
  11. Remove the twine, slice and serve.
 

Monday, September 13, 2021

Plum Almond Cake


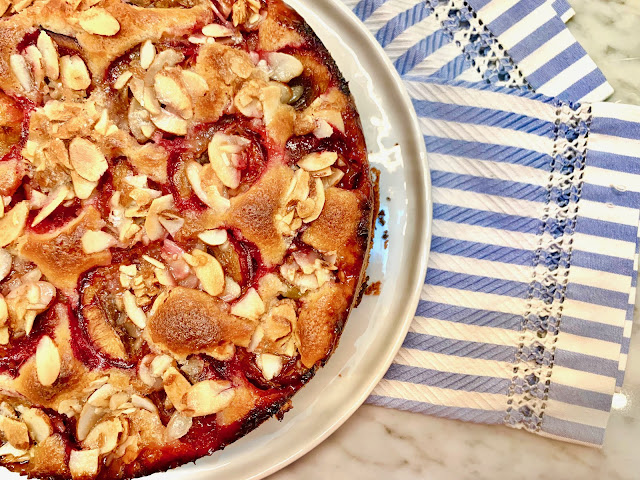
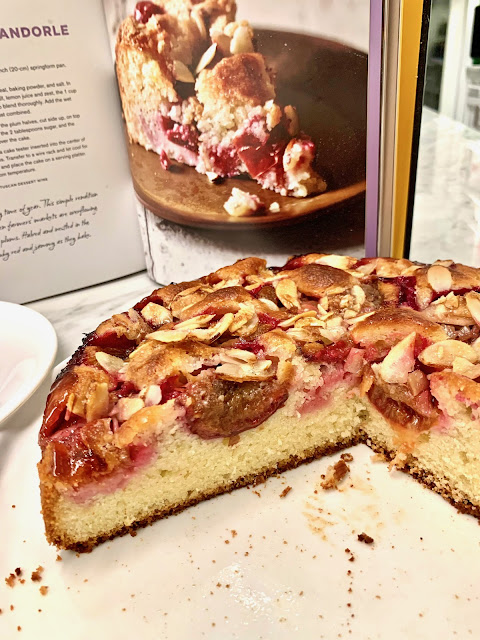
I’ve been making the well-known plum cake from Marian Burros and the New York Times for years, but recently decided to try a similar one in Domenica Marchetti’s cookbook “Rustic Italian.” Her recipes are always winners and this was no exception. It incorporates a little almond flour in addition to all-purpose flour, but what really sets this apart is the sugary-almond topping nestled over the plums. The crunchy coating takes it over the top, although it loses its crispness when it sits overnight. No problem, because it’s so delicious, you’re not likely to have any leftovers the next day.

It uses Italian prune plums, and although Domenica’s recipe calls for nine of them, mine were smaller and I needed a lot more to fill the pan. It’s a cinch to remove the pits. Just slice down the middle, twist each half in the opposite direction, and pull out the pit. Lay the plums over the batter cut side up.

Top with the almond-butter-sugar coating and bake.The crumb is really tender, the fruit is jammy and the topping is sugary and irresistible. I don’t know what took me so long to make this cake, but it’s now at the top of my list when I have a hankering for a slice of cake. I think this would taste great with apricots, peaches or other fruits too when Italian prune plums are hard to find. Grazie mille, cara Domenica.

Click here to connect with me on Instagram and find out what’s cooking in Ciao Chow Linda’s kitchen each day (and more).

Plum Almond Cake
Author: Ciao Chow Linda via Domenica Marchetti
Ingredients
  • 1/2 cup sunflower or vegetable oil, plus more for greasing
  • 1 cup unbleached all-purpose flour, plus more for dusting
  • 1/2 cup almond meal or almond flour
  • 2 teaspoons baking powder
  • 1/4 teaspoon fine sea salt
  • 1 large egg
  • 1/2 cup half and half or whole milk
  • finely grated zest and juice of 1 large lemon
  • 1 cup sugar, plus 2 tablespoons
  • 1/4 teaspoon pure almond extract
  • 9 Italian plums, halved and pitted (or more if they’re small)
  • 1/4 cup sliced almonds
  • 2 tablespoons unsalted butter, at room temperature
Instructions
  1. Preheat the oven to 375 degrees F. Lightly oil an 8-inch springform pan. Dust tthe pan with flour and tap out the excess.
  2. In a large bowl, whisk together the flour, almond meal, baking powder and salt.
  3. In a separate bowl, combine the oil, egg, half and half (or milk), lemon juice and zest, the 1 cup sugar, and almond extract.
  4. Whisk to blend thoroughly.
  5. Add the wet ingredients to the flour mixture and whisk until just combined.
  6. Pour the batter into tthe prepared pan.
  7. Arrange the plum halves, cut side up, on top of the batter.
  8. In a bowl, combine the almonds, the 2 tablespoons sugar and the butter and mix well.
  9. Dot the almond topping over the cake.
  10. Bake until the topping is golden brown and a cake tester inserted into the center of the cake comes out clean, about 45 minutes.
  11. Transfer to a wire rack and let cool for 20 minutes.
  12. Remove the ring from the pan and place the cake on a serving platter.
  13. Cut into wedges and serve warm or at room temperature.


Monday, September 6, 2021

Cherry Tomato Focaccia


Summer is winding down here in the Northeast U.S., but I’ve still got plenty of teensy cherry tomatoes ripening on the vine in my garden. These mini cherry tomatoes are perfect atop a focaccia, although you could certainly use regular-sized cherry tomatoes instead. The basic no-knead focaccia recipe comes from Bon Appetit, and I added the tomatoes and rosemary. Feel free to try other herbs, such as thyme or oregano if rosemary isn’t to your liking.

The hardest part of this recipe is stretching the dough across the pan. It keeps wanting to spring back, but be persistent and keep pressing and stretching until it reaches all the edges. (NOT TRUE – SEE UPDATE BELOW)

UPDATE: Let the dough rise a second time in the pan BEFORE trying to stretch it out. It works much much better that way. This is a photo of the dough when I tried to stretch it out before letting it rise a second time. It worked, but it’s much better to let the blob of dough sit in the pan to rise a second time before pressing it out.

This is a photo of the dough after it had risen a second time. Only then, did I try to stretch it while in the pan, and it had already stretched nearly to all the edges by itself. After it had risen, and I stretched it the rest of the way into the corners of the pan, I dimpled it with fingers that were wet with a little olive oil.

Then I scattered the tomatoes, minced rosemary and kosher salt on top, with another little drizzle of olive oil. 

Bake it in a 450 degree F. oven for about 20 minutes to a half hour, or until lightly golden.The recipe makes enough for a crowd, so if you can’t eat it all the same day it’s baked, it’s best to freeze the leftovers and reheat another day.Bon Appetit’s recipe calls for a brush of melted butter on top, but I prefer to drizzle with a bit more olive oil and sea salt, Pour yourself a nice drink, and enjoy a slice of this focaccia as a perfect accompaniment.

Click here to connect with me on Instagram and find out what’s cooking in Ciao Chow Linda’s kitchen each day (and more).

Cherry Tomato Focaccia
Author: Ciao Chow Linda
Ingredients
  • 1 ¼-oz. envelope active dry yeast (about 2¼ tsp.)
  • 2 tsp. honey
  • 5 cups (625 g) all-purpose flour
  • 5 tsp. Diamond Crystal or 1 Tbsp. Morton kosher salt
  • 6 Tbsp. extra-virgin olive oil, divided, plus more for hands
  • a bunch of cherry tomatoes
  • butter to grease the pan
  • Flaky sea salt
  • minced fresh rosemary
Instructions
  1. Whisk one ¼-oz. envelope active dry yeast (about 2¼ tsp.), 2 tsp. honey, and 2½ cups lukewarm water in a medium bowl and let sit 5 minutes (it should foam or at least get creamy; if it doesn’t your yeast is dead and you should start again—check the expiration date!).
  2. Start adding the flour and salt, but add only four cups flour at first and mix. Add more flour if needed. What you want is a shaggy dough with no dry streaks of flour.
  3. Pour 4 Tbsp. extra-virgin olive oil into a big bowl that will fit in your refrigerator.
  4. Transfer dough to bowl and turn to coat in oil.
  5. Cover with a silicone lid or plastic wrap and chill until dough is doubled in size (it should look very bubbly and alive), at least 8 hours and up to 1 day.
  6. If you’re in a rush, you can also let it rise at room temperature until doubled in size, 3–4 hours.
  7. After the dough has risen double in size, use a silicone spatula, gather up edges of dough farthest from you and lift up and over into center of bowl.
  8. Give the bowl a quarter turn and repeat process.
  9. You want to deflate dough while you form it into a rough ball.
  10. Generously butter a 13×9″ baking pan, for thicker focaccia that’s perfect for sandwiches, or an 18×13″ rimmed baking sheet, for focaccia that’s thinner, crispier, and great for snacking.
  11. The butter may seem superfluous, but it’ll ensure that your focaccia doesn’t stick.
  12. Pour 1 Tbsp. extra-virgin olive oil into center of pan.
  13. Dump the dough to the center of the prepared pan.
  14. If you try to stretch it out right away to the corners of the pan, it will be difficult.
  15. Wait ten or fifteen minutes, then stretch out the dough. It will be much easier.
  16. Pour any oil left from the bowl over and turn dough to coat it in oil.
  17. Let rise a second time, uncovered in the baking sheet, in a dry, warm spot (like near a radiator or on top of the fridge or a preheating oven) until doubled in size, at least 1½ hours and up to 4 hours.
  18. Place a rack in middle of oven; preheat to 450°.
  19. To see if the dough is ready, poke it with your finger. It should spring back slowly, leaving a small visible indentation.
  20. If it springs back quickly, the dough isn’t ready. (If at this point the dough is ready to bake but you aren’t, you can chill it up to 1 hour.)
  21. Lightly oil your hands. If using a rimmed baking sheet, gently stretch out dough to fill.
  22. Dimple focaccia all over with your fingers, creating very deep depressions in the dough (reach your fingers all the way to the bottom of the pan).
  23. Place cherry tomatoes throughout the focaccia, pushing them down into the dough,
  24. Drizzle with remaining 1 Tbsp. extra-virgin olive oil and sprinkle with flaky sea salt and the minced rosemary.
  25. Bake focaccia until puffed and golden brown all over, 20–30 minutes.
  26. Drizzle with more olive oil and additional salt if needed.
  27. Focaccia is best eaten the day it’s made, but keeps well in the freezer.
  28. Slice it into pieces, store it in a freezer-safe container, then reheat it on a baking sheet in a 300° F oven.