Saturday, May 25, 2019

Ricotta and Nutella Tart

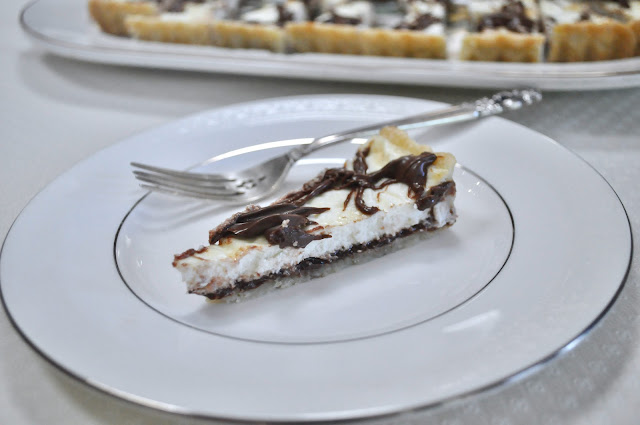
If you’re a chocolate and hazelnut fan, this recipe is for you. It’s got a bottom layer of Nutella, covered with a ricotta mixture and drizzled with more Nutella on top. The first time I made the recipe, I used a ready made crust and it crisped up nicely, browning perfectly on the bottom. I loved the flavor combination but thought it could benefit from a doubling of the ricotta layer.

So the next time I made it, I doubled the recipe for the ricotta layer.

The filling tasted great, but the problem was that the crust was undercooked on the bottom, even though I left it in the oven a little longer than the recipe called for. It could be because in addition to doubling the amount of ricotta, I also baked two tarts in the oven at the same time, which may have caused the pastry to bake unevenly. Or was it because I forgot to prick the pastry before smearing on the Nutella? In any event, it’s worth making this tart, but be warned – bake only one tart in the oven at a time for best results.

Click here to connect with me on Instagram and find out what’s cooking in Ciao Chow Linda’s kitchen each day (and more)

Ricotta and Nutella Tart
Author: Rosemary Molloy’s “Authentic Italian Desserts” via Ciao Chow Linda
Ingredients
  • 1 cup ricotta cheese
  • 1/4 cup 2% milk
  • 1/2 tablespoon granulated sugar
  • 1/2 cup plus 1/4 cup chocolate-hazelnut spread, divided
  • your favorite tart or pie crust dough, chilled
Instructions
  1. In a blender, combine the ricotta cheese, milk and sugar, and blend until completely combined.
  2. Pour the mixture into a glass bowl and refrigerate until ready to use.
  3. Preheat the oven to 350 degrees, then lightly grease and flour a 9-inch tart or pie tin.
  4. Remove the dough from the fridge.
  5. On a floured work surface, roll the dough into a 1/8 inch thick circle.
  6. Place it in the prepared tin, trim any overhanging dough with a sharp knife and crimp the edges.
  7. Prick the bottom of the crust with a fork.
  8. Spread the bottom of the crust with 7 ounces of the chocolate-hazelnut spread.
  9. If the spread is too thick, soften it in the microwave or place it in a heatproof bowl on top of a pot of boiling water.
  10. Remove the ricotta filling from the fridge and pour it over the chocolate-hazelnut spread.
  11. Bake the pie for 25 to 30 minutes or until the crust is golden.
  12. Let the pie cool completely then drizzle with the remaining 1/4 cup chocolate-hazelnut spread.
  13. Refrigerate the pie for 2 hours before serving.


Monday, May 13, 2019

Rice, Salami and Cheese Casserole

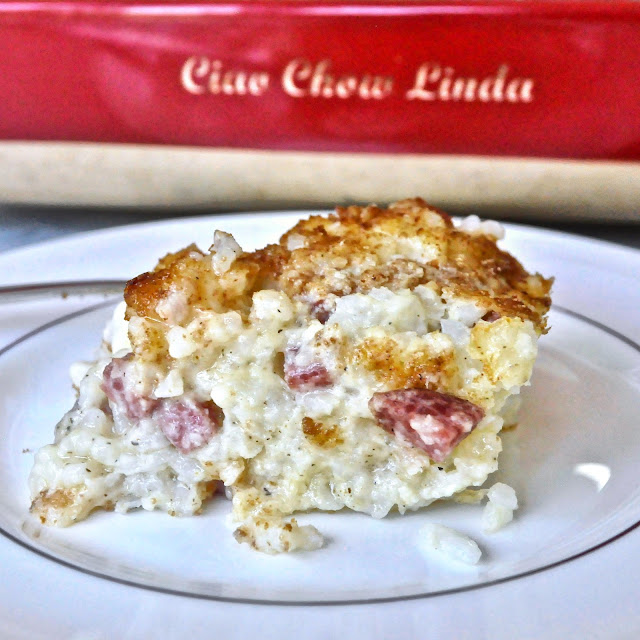
Hide your bathroom scales if you decide to make this one – it’s loaded with cheese, salami and eggs, but it’s oh so worth it. Just make sure to invite a lot of people over. Even after serving it to my Italian chit-chat group (and there were 16 of us at the table that day), I still had enough left over to share with two different neighbors, and for my own dinner. The recipe comes from my friend Milena, who hails from La Spezia, and who is part of that Italian chit-chat group. You can make it without the meat if you choose, but the salami gives it a nice, spicy accent. I used a mixture of a basic Genoa-type salami, and one that was coated with black pepper. You could skip the salami and use cubed ham instead if you prefer.

Here is the pile of cheeses that went into it – mozzarella, pecorino and parmesan. Milena’s original recipe also called for cheddar cheese, but I don’t think it needs it, so I left it out.

You mix the rice, cheeses and salami with some beaten eggs and milk and press it into a casserole.Then poke holes all around the casserole and pour in more of the eggs and milk mixture.

Sprinkle some bread crumbs and paprika on top and bake for about 45 minutes.

It’s hard not to keep eating it, but with bathing suit season right around the corner, I had to control myself.

But not for long. Guess what was mid-morning snack the next day?

Click here to connect with me on Instagram and find out what’s cooking in Ciao Chow Linda’s kitchen each day (and more)

Rice, Salami and Cheese Casserole
Author: Ciao Chow Linda

Serves: 12-16 servings
Ingredients
  • 3 cups rice (I used arborio but long grain white rice is fine.)
  • 7 cups water
  • 1 teaspoon salt
  • 1 stick of unsalted butter (8 tablespoons)
  • 4 eggs
  • 1/2 lb. diced Genoa salami
  • 1/2 lb. cubed or shredded mozzarella cheese
  • 1 cup grated cheese (I used a mixture of parmesan and pecorino)
  • 2 cups milk
Instructions
  1. Cook rice in water and salt.
  2. Add the butter and mix well.
  3. Add the cheeses and salami and mix well.
  4. Beat the eggs and milk, and add half to the cooked rice mixture.
  5. Put the rice mixture into a greased, ovenproof casserole. (mine was 9 1/2 inches by 12 inches)
  6. With a fork, poke holes on the top and pour the rest of the milk-egg mixture over the rice.
  7. Sprinkle with bread crumbs and paprika.
  8. Bake at 350 degrees, covered for 45 minutes.
  9. Let it rest for five minutes before serving.

Tuesday, May 7, 2019

Sausage and Cabbage Cake

Rachel Roddy, a Rome-based cookbook author and columnist for the British newspaper The Guardian, has been inspiring me for years, especially after the publication of her book  –  “A Kitchen In Rome.” I’ve worked my way through many of the recipes, but haven’t made this one – for sausage and cabbage cake – until now. I don’t what took me so long, since it’s pretty quick to put together and elevates pedestrian cabbage rolls to company-worthy fare. It all starts with this beautiful Savoy cabbage, a vegetable that, aside from being highly edible, deserves to be in a still life painting.
Remove seven of the largest and unblemished leaves and blanch them for a couple of minutes, patting them dry after you’ve rinsed them in cold water.
You need to quarter the remaining cabbage, and blanch them for five minutes too.
In a buttered 8″ cake tin, place the largest and prettiest leaf. 
Layer in the other six leaves on top of the bottom leaf.
Push the sausage meat firmly inside the cake tin, using your hands to help conform to the shape of the panFill in with the rest of the cabbage, then fold in the overlapping leaves and press firmly. Dot with butter and place in a 350 degree oven for an hour.
I placed the pan inside another pan in case some juices spilled out during baking. as you can see, the top layer gets a little browned. Not to worry – that’s going to be the bottom when you serve it.
See, when you flip it out, it gets all show-offy, pretending to be a miniature oak tree.  (Be sure to flip it onto a plate over the sink because a lot of hot, watery juices will spill out).
I served it with a plain marinara sauce, but a cheese sauce, or a béchamel sauce would be right at home here too. Wine optional. No, revise that. Serve with a good glass of dry red or white wine – and some crusty bread.

Click here to connect with me on Instagram and find out what’s cooking in Ciao Chow Linda’s kitchen each day (and more)

Sausage and Cabbage Cake
Author: Rachel Roddy via Ciao Chow Linda
Ingredients
  • 1 large Savoy cabbage
  • 2 tablespoons olive oil
  • 1/2 teaspoon fennel seeds (I used fennel pollen)
  • salt and freshly ground black pepper
  • 1 1/2 tablespoons butter
  • about 1 pour very lean, well-seasoned sausage (without casings)
Instructions
  1. Remove 7 of the largest, handsomest outer leaves (discard any that are discolored or damaged) and wash them carefully.
  2. Bring a large pot of salted water to a boil and add the chosen leaves.
  3. Wait for the water to come back to a boil, then blanch the leaves for 2 minutes.
  4. Use a slotted spoon to remove the leaves and drain in a colander in the sink, rinsing with very cold water to fix the color.
  5. Drain them well and spread them out flat to dry thoroughly on paper towels.
  6. Set them aside.
  7. Cut the rest of the cabbage into quarters and bring the same water back to a boil.
  8. Cook the cabbage quarters in the boiling water for 5 minutes, by which time the leave should be tender but the stems still firm.
  9. Drain the cabbage, rinse with cold water, drain again, and squeeze out any excess water.
  10. Cut away the hard central stem and separate the leaves into a bowl.
  11. Dress them with olive oil and fennel seeds and season with salt and pepper.
  12. Preheat the oven to 350 degrees F. and grease an 8-inch round shallow ovenproof dish with half the butter.
  13. Choose the largest and best-looking leaf from the 7 you have set aside and place it in the bottom of the dish.
  14. It should cover the base and come up the sides. (Mine didn’t)
  15. Arrange the other 6 leaves so that they cover the sides of the dish, fanned out, overlapping a lot and hanging over the edges.
  16. Using a third of the seasoned cabbage, make a layer at the bottom of the dish and cover with half the sausage, pressing it down so it molds into the dish.
  17. Repeat the process, ending with a third layer of cabbage leaves.
  18. Press everything into the dish. Fold and bring in the overlapping leaves to cover the top and make a neat packet.
  19. Dot with the remaining butter and bake for 1 hour.
  20. (Readers please note, Ciao Chow Linda used half of the cabbage and all the sausage here, and finished with the other half of the cabbage, ending with folding the overlapping leaves. )
  21. Remove and allow the cake to stand for 5 minutes before inverting a serving plate on top of the baking dish and turning out the cake.
  22. Be careful, and do this over the sink, as there will be hot juices.