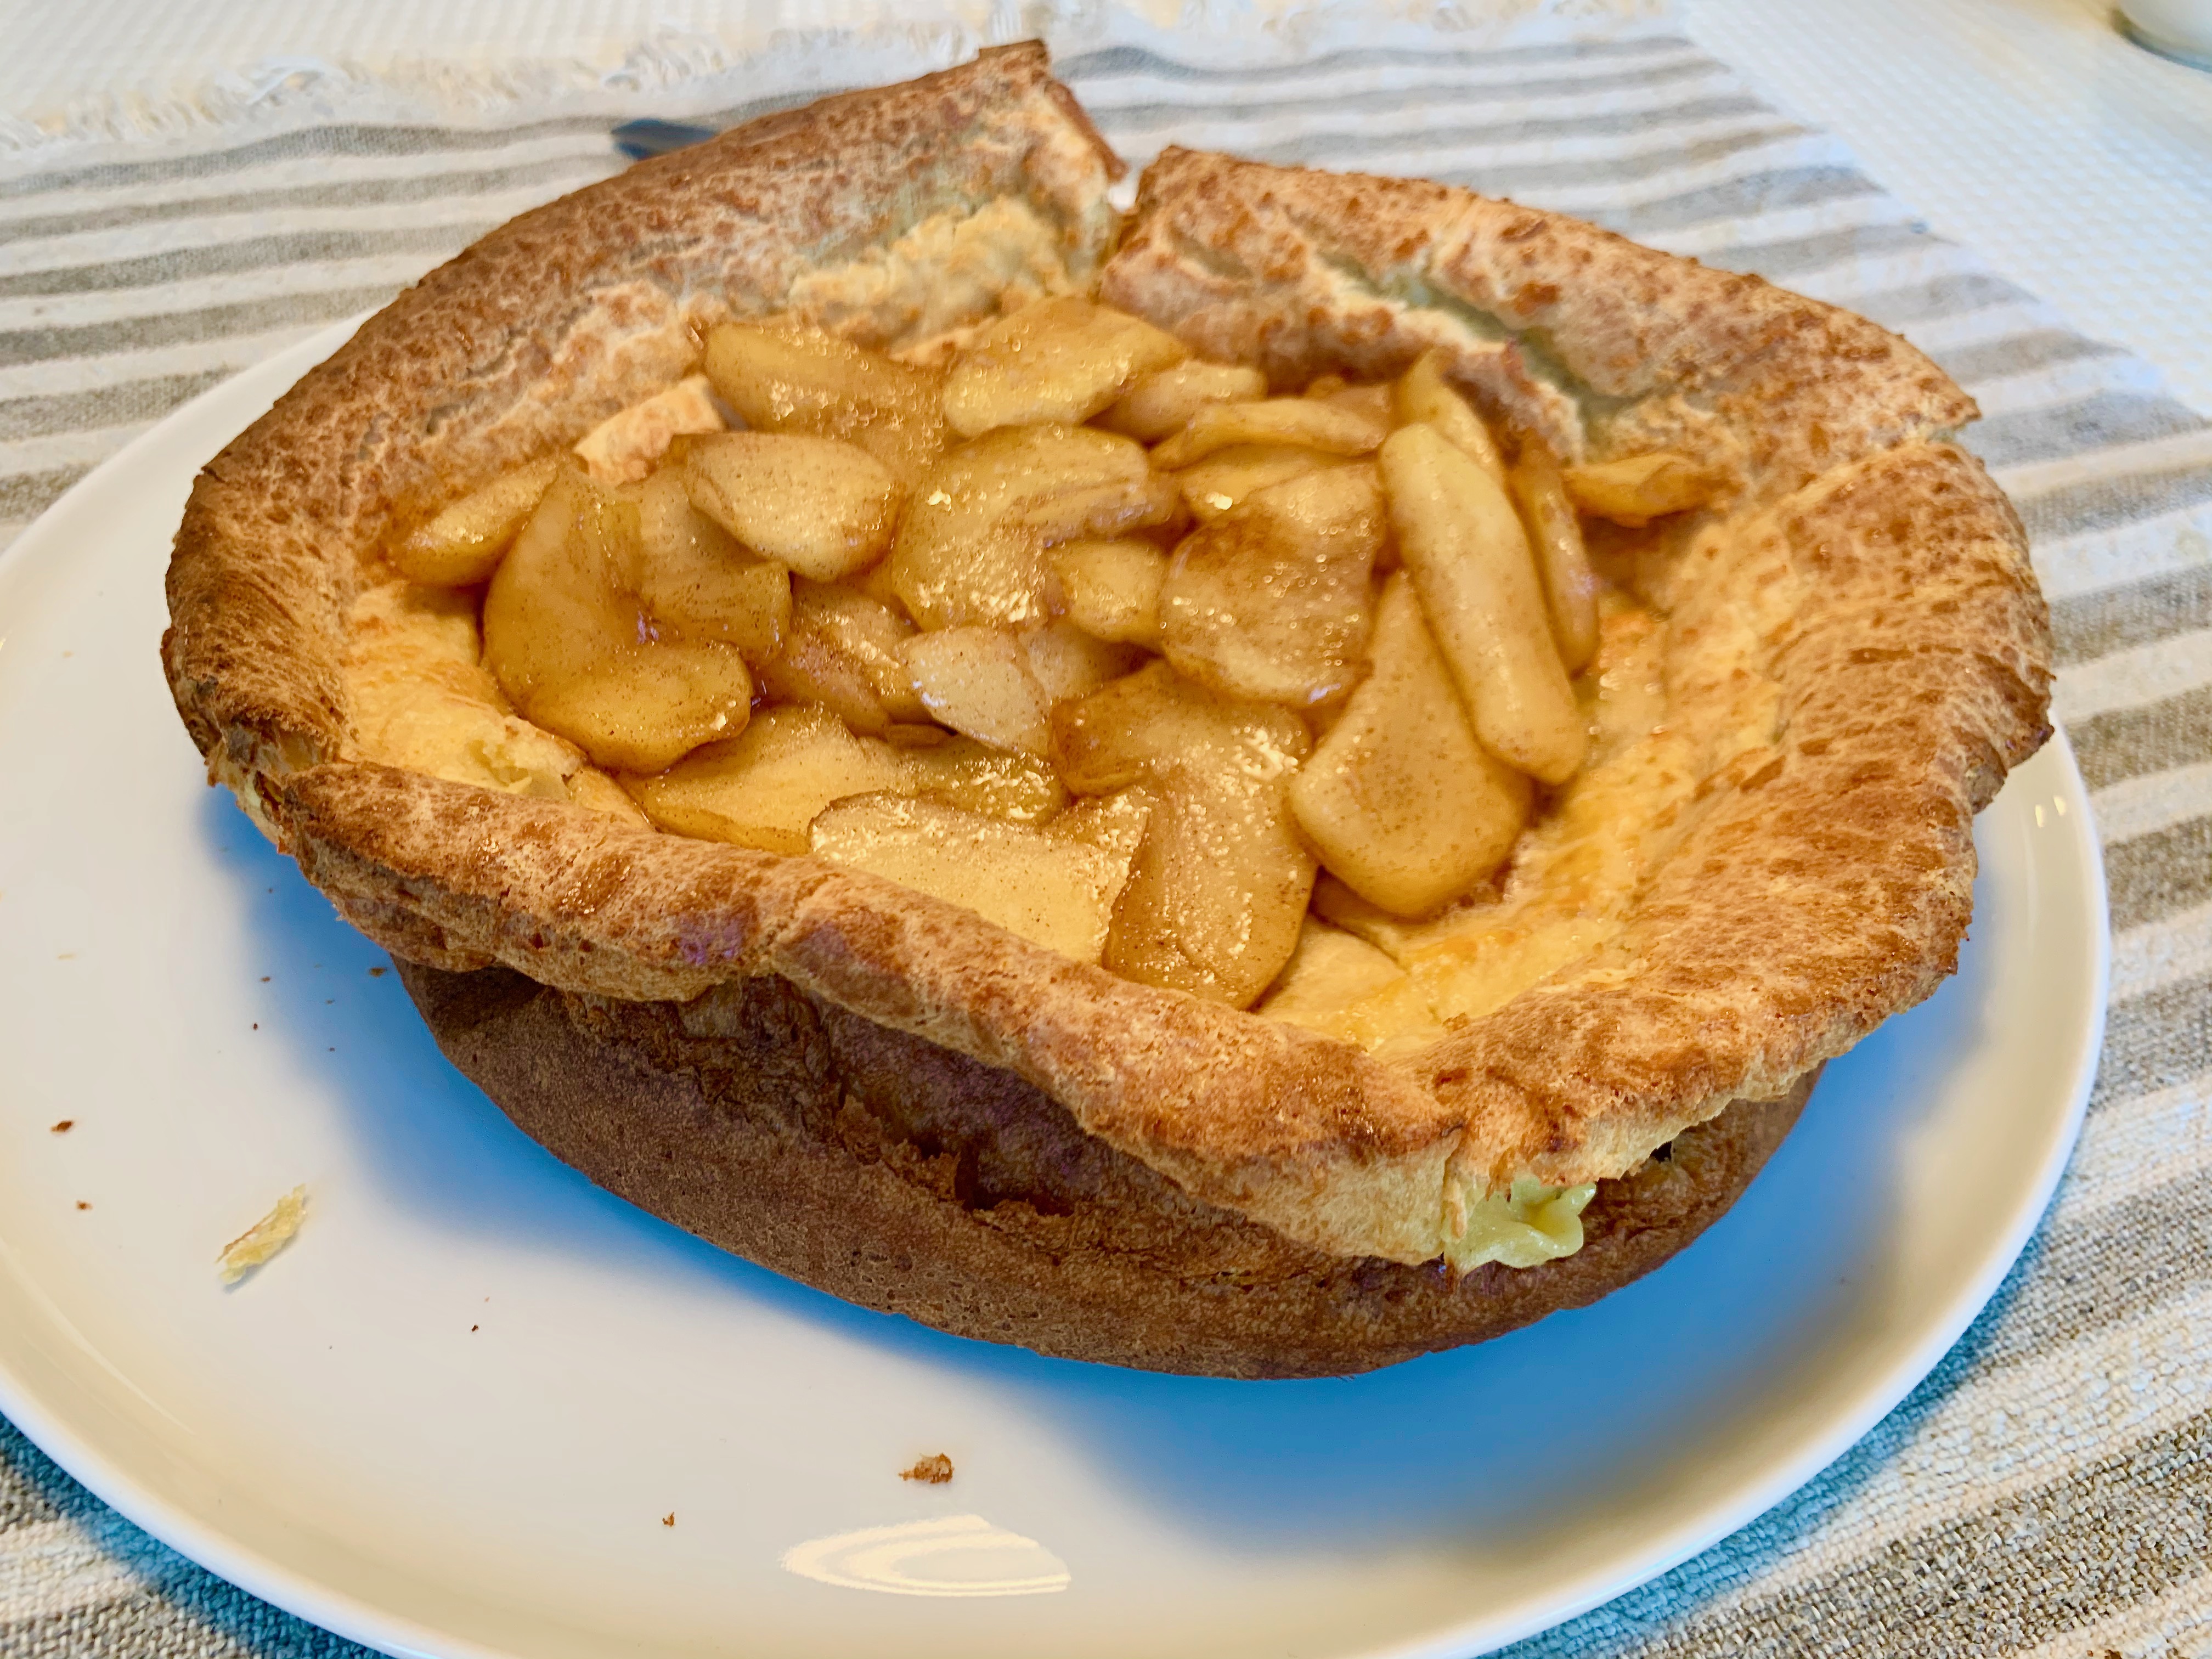
I’ve been wanting to make one of these eggy treats – called Dutch baby or German pancake –for quite a while and it wasn’t until I saw it being made on America’s Test Kitchen that I finally got around to it. Well, that’s not exactly true. I tried making one about a year ago and it wasn’t exactly photogenic. But I should have had a bit more faith, since the center started to deflate after a minute or two of removing it from the oven, bringing in the sides to form a high ridge above the custardy center. I was starting to become a believer. By the time I spooned all the apples to the interior, it was a vision of deliciousness and we couldn’t wait to dive in.
The key to this Dutch baby’s success has a lot to do with an unusual approach to oven temperature. It seems counter intuitive, but you start it in a cold oven, cranking it to 375 degrees only after you place the pan in the oven. Starting it in a cold oven allows for a slower build-up of heat, so the center can start to set before the oven reaches the temperature necessary to give the highest lift to the rim (which takes about 25 -30 minutes). A lot of Dutch babies have a very thin base, but this technique allows for a thicker center, which is more satisfying to eat and better able to serve as a base for the apple topping. It slipped out very easily from the cast iron skillet I used onto a serving platter.
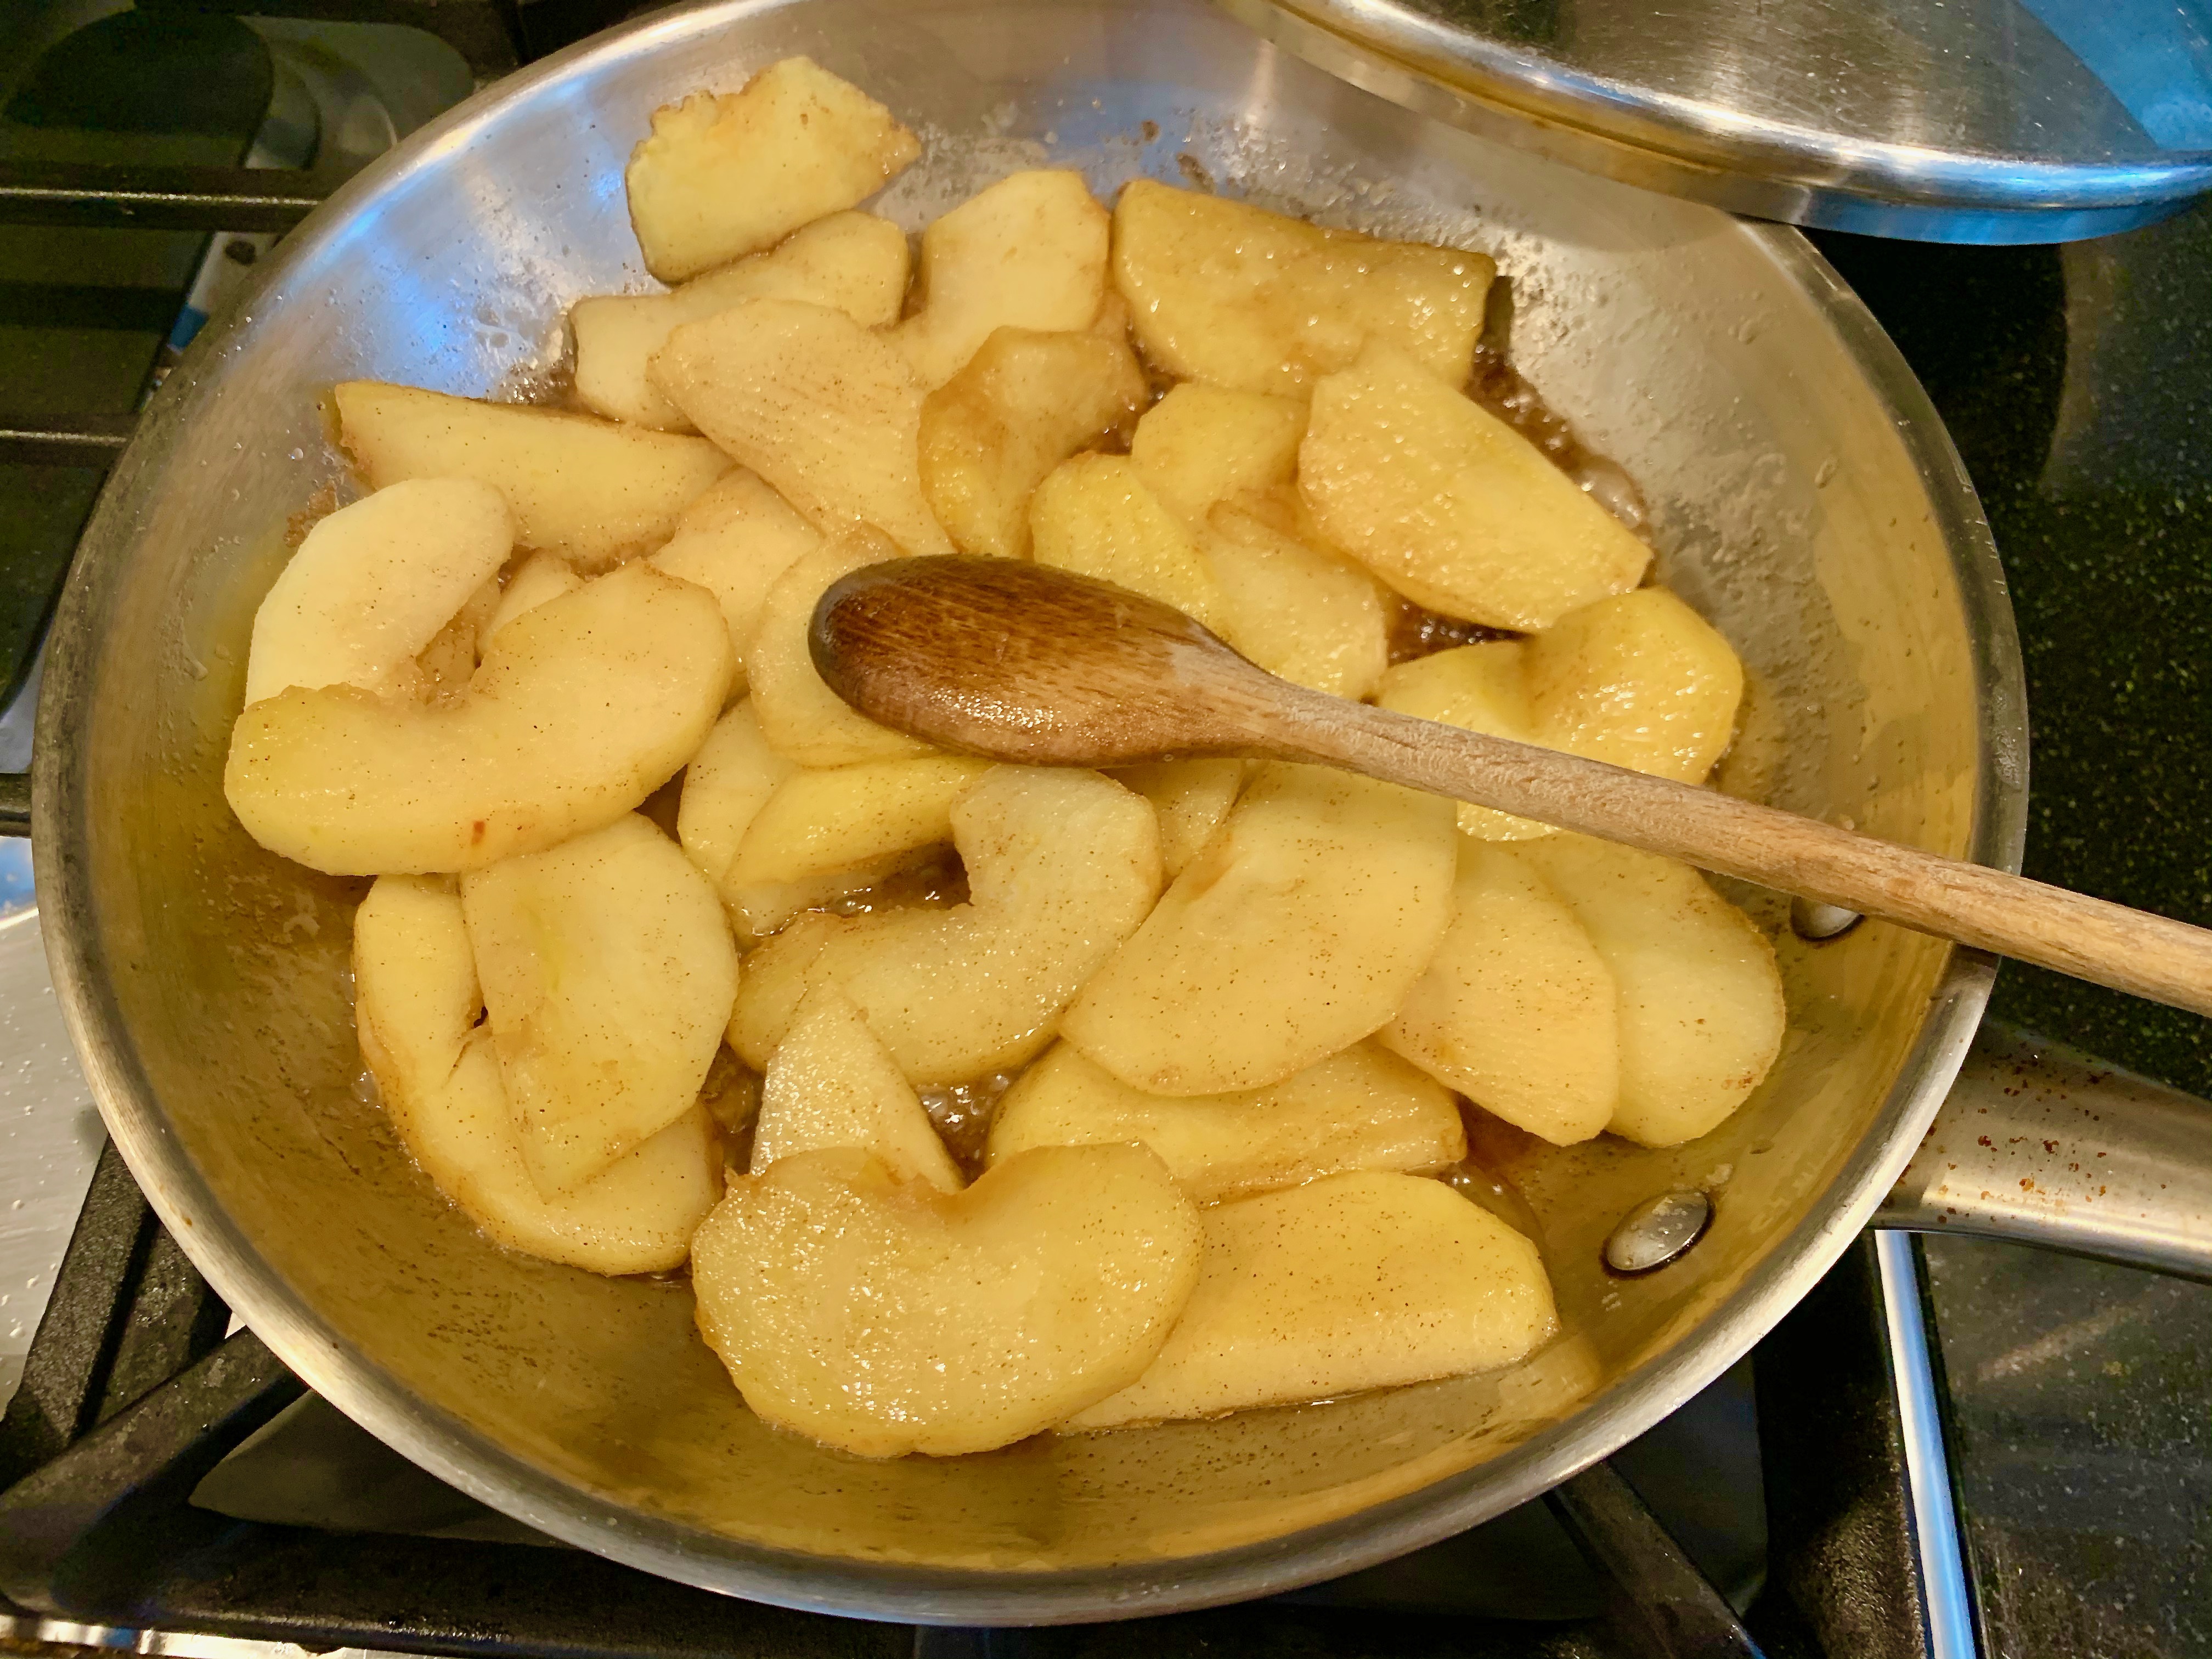
This apple Dutch baby recipe also calls for the apples to be cooked separately in a saucepan, rather than cooked with the batter, ensuring that you don’t end up with a heavy, leaden pancake.
Spoon the apples over the Dutch baby, then either sprinkle with powdered sugar or serve with maple syrup. Cut a slice or two for yourself. It would be a delicious way to start the new year.
Click here to connect with me on Instagram and find out what’s cooking in Ciao Chow Linda’s kitchen each day (and more)
Dutch Baby/German Pancake with spiced apples
Author: Ciao Chow Linda via America’s Test Kitchen
Looking for a last minute gift for friends, neighbors or relatives? You still have time to make this, and it’s really great to give away — not just because it’s delicious and a nice thing to do at holiday time, but also because it’s so darn addictive, you’ll have to get it out of the house before you eat it all. It makes a lot, so you’ll have plenty for passing to sweets lovers.
The hardest part is making the toffee, because it can easily burn if you’re not keeping an eye on it. Conversely, if you don’t cook it enough, it will be too soft and won’t have that crunch you associate with toffee. If you have a candy thermometer, you’re one step ahead of the game. I found mine broken in a drawer, so I had to rely on another way to gauge whether it was ready — dropping a bit from a wooden spoon into a glass of ice water. If it’s still pliable after you’ve dropped it in the water, it’s not done. If it snaps crisply, it’s done, so you can pour the syrup over the nuts and chocolate.
Spread half of the nuts (toasted to bring out the best flavor) over a sheet of parchment paper, then spread half of the chocolate that you’ve broken up either by hand or in a food processor. Pour the syrup over everything.
After you’ve poured the syrup over the nuts and chocolate, then spread the remaining chocolate over the syrup. Wait a few minutes for the chocolate to soften, then smooth it over the candy with a spatula. Sprinkle the remaining nuts on top and wait for it to cool. Take a knife, and cut into pieces. If you’re like me, you’ll have a lot of loose bits that won’t look too great as gifts, so save those for yourself to eat out of hand, or for using as an ice cream topping.
Place into attractive boxes, tins or jars, and spread some good cheer to others before you eat it all.
Click here to connect with me on Instagram and find out what’s cooking in Ciao Chow Linda’s kitchen each day (and more)
1 teaspoon espresso powder, optional; for enhanced flavor
3 tablespoons (43g) water
1 tablespoon (21g) light corn syrup
1 teaspoon baking soda, optional (see “tips,” below)
2 cups (227g) diced pecans or slivered almonds, toasted
2 2/3 cups (454g) semisweet or bittersweet chocolate, finely chopped; or chocolate chips
Instructions
In a large, deep (3 quart) saucepan, melt the butter.
Stir in the salt, sugar, espresso powder, water, and corn syrup, and bring the mixture to a boil.
Boil gently over medium heat, without stirring, until the mixture reaches hard-crack stage (300°F on an instant-read or candy thermometer; you’ll be taking it off the heat a few degrees sooner).
The syrup will bubble without seeming to change much for awhile, but be patient; all of a sudden it will darken, and at that point you need to take its temperature and see if it’s ready.
(If you don’t have a thermometer, test a dollop in ice water; it should immediately harden to a brittleness sufficient that you’ll be able to snap it in two, without any bending or softness).
This whole process should take about 10 to 12 minutes.
Pay attention; too long on the heat, and the syrup will burn.
While the sugar is boiling, spread half of the nuts in an even, closely packed layer on a parchment-lined 9″ x 13″ pan.
Top the nuts with half the chocolate.
When the syrup has reached 295°F, remove from the heat and stir in the baking soda; it will foam up, so use caution.
Pour the syrup quickly and evenly over the nuts and chocolate.
Top with the remaining chocolate and let sit for 2 to 3 minutes, until it softens; spread the chocolate with an offset spatula in an even layer and immediately sprinkle the remaining nuts on top.
While the candy is still slightly warm, pull it out of the pan and use a thin spatula to loosen it from the parchment.
If there’s a holiday or special occasion in my household, ravioli are bound to be on the menu. They’re my husband’s favorite pasta, conjuring childhood memories of helping his mother by pressing a fork into the edges of each pillow of dough to help secure the filling.
But when I thought about making them last week to help my dad usher in his 99th orbit around the sun, I realized I’d never really blogged about the basic ravioli in tomato sauce that is the hands-down favorite in my family. I’m here to correct that now, with this bountiful platter of ricotta and parmesan cheese-filled ravioli. I sometimes deviate slightly and add greens to the traditional cheese filling (spinach, swiss chard or even the wild greens I forage for in the spring and freeze) and I’ve included that in the recipe below. Whether I add the greens or just fill them with the cheese, they disappear from the platter before you can say abbondanza.
Let me show you how I make them and hopefully get you inspired. If you take it in steps and make the sauce ahead of time, it won’t seem so daunting. I usually make a big pot of sauce with meatballs and sausage every couple of months, and freeze enough for four or five meals. It’s easy to pull a container from the freezer and just concentrate on the pasta-making itself. For the basic meatballs and sauce recipe, click here.
The dough can be made a day or two ahead of time too, and stored in the refrigerator in plastic wrap. I used to make it the old-fashioned way, by forming a mound of flour, then making a well, adding the eggs, and kneading it until smooth. But years ago, I started using the food processor to do most of the work, and haven’t looked back since. You still have to knead it a little when you remove it from the food processor, but it’s very little labor compared to doing it all by hand. It does need to rest at least a half hour before you proceed to roll it out and shape it into ravioli.
You can roll it out by hand with a rolling pin if you’re a purist (or a masochist), or you can get one of these hand-cranked pasta machines. I’ve had mine for 50 years (yea, I’m old) and it still works great. I keep it at the shore house for when I’m inspired during the summer.The rest of the year, I roll out the pasta with the attachment to my KitchenAid mixer, which makes things go a lot quicker.
I have the filling all ready to go though, before starting to roll the pasta. Make sure to drain the ricotta a few hours or overnight. I have used cheesecloth, or even coffee filters to hold the ricotta, with weights on the top. You’d be surprised at how much water comes out. And I always buy the full-fat ricotta cheese. Don’t skimp on the calories here please. The filling in the photo contains wild greens, but as I said, you can omit the greens and just go with the cheeses.Here’s another nifty tool that I started using a few years ago. It makes much more uniform ravioli, plus you won’t be likely to have ravioli with too much dough around the edges, as you might if you formed them by hand. But this too, is totally unnecessary, and in some ways, the hand-formed ones have a certain nostalgic charm, bringing back more vivid memories from my childhood, as I watched my mother shape them at the kitchen table.
Here you can see what to do when you make the ravioli using the form. I generally spray the form first with PAM, or brush lightly with oil. Then you place a sheet of the dough over the form, add a spoonful of the filling, wet the edges of the dough with water, and place a second sheet of pasta over the filling.Press down carefully, starting from the center, to eliminate any air bubbles. Cut off the excess dough from the edges, then flip it out, and cut between each raviolo.
You’ll have perfect, uniform ravioli this way.Alternately, if you don’t have the ravioli form, place a sheet of dough directly on your counter or board, add dollops of filling, and moisten between the filling with a brush of water, before adding a second sheet of pasta and helping it to adhere.Then press down gently to eliminate air bubbles, and use a rolling cutter, or a knife, to cut between the individual ravioli.You don’t really need to make the fork indentations if you’ve sealed between the layers of dough and pressed down properly, but my husband likes this job, and it’s a little more “insurance” to keep the ravioli from bursting open when you cook them in water.
By the way, after they come to an initial boil in the water, lower them to a simmer, since a vigorous boil could also cause them to rupture.
With the leftover scraps, I roll out the dough again, but the more you add the leftover scraps together and reroll them, the tougher they get. So I cut them into small “quadretti” to use in soups, where the texture is less important.
I made the ravioli last week to bring to my dad, who lives about an hour away, with his wife. (I also kept a bunch for my husband or there would have been mutiny). My dad was recovering from some dental work and could eat only soft foods, but it was also part of my gift to him to celebrate his birthday. It’s hard to fathom that he was born nearly 100 years ago — the year Warren Harding was inaugurated president of the U.S.; the year Babe Ruth achieved 139 home runs; the year of the first Miss America contest in Atlantic City; and the year that the police in Sunbury, Pennsylvania, issued an edict requiring women to wear skirts at least 4 inches below the knee! Until the pandemic, he was still occasionally playing golf and beating guys much younger than he. I hope I’m as nimble and sharp-witted when (and if) I get to be his age!
I love making pasta, I love maintaining family food traditions, and I love my dad.
I hope you make ravioli for someone you love too.It’s a win-win for everyone — including you, especially if you give yourself a big serving!
Click here to connect with me on Instagram and find out what’s cooking in Ciao Chow Linda’s kitchen each day (and more)
1 pound whole milk ricotta cheese, drained overnight if possible
1 cup parmesan cheese
a few sprigs of parsley, finely minced
optional – 3/4 cup chopped spinach or wild greens, or broccoli rape, cooked and squeezed tight of liquid
salt, pepper
nutmeg
FOR THE PASTA:
1 1/2- 2 cups flour, adding more as needed
pinch of salt
3 eggs
Instructions
Mix the ingredients for the filling. If using frozen spinach, don’t cook it. Let it thaw, then squeeze all the liquid, or as much as possible from the spinach. If using wild greens or broccoli rape, cook in water until tender, then drain, cool, and squeeze out all water possible. Mince and mix with other filling ingredients.
For the pasta, blend everything in a food processor. It’s best to start with less flour and add more as you need, since it’s much more difficult if you have too much flour and not enough liquid. Blend everything until the dough comes together in a ball. If it’s too wet, add more flour. Knead a little more on a floured surface until it’s very smooth, like a baby’s bottom. Cover with plastic wrap and let it rest at least a half hour.
After it has rested, roll it through a pasta machine, starting with the thickest setting and ending up about two settings short of the thinnest setting. Try to roll it out so that you have an evenly long piece of dough that will fit across your ravioli form. If you’re not using a ravioli form, just lay out the dough on the counter, drop about a tablespoon of filling, evenly spaced across the dough, then cover with another layer of dough. Spread a little water with your finger, along the edges, to help the sealing. Starting from the middle, press down on the spaces between the ravioli, working out to the edges. Using a pasta/pastry crimper (or a knife if you don’t have one), crimp the dough between the filling, then separate the ravioli, and use a fork to crimp along the edges, ensuring the ravioli don’t open when boiled.
When cooking in the boiling water, lower the temperature so that the ravioli just come to a low simmer, or low boil. If they boil too vigorously, you risk bursting the ravioli.
Need a coffee break after all that shopping and wrapping gifts? Ma certo! And you’ll need something to go with that, no? These crumiri cookies, traditional in Italy’s Piedmont region, are the perfect treat to accompany a good cup of espresso. They’re sweet, but not overly sweet. In fact, a sprinkling of powdered sugar or drizzle of chocolate adds just the right touch to make these cookies stand out. They’d also make a great gift to ship to some of those friends and relatives you can’t see due to the Covid pandemic.
The hardest part is squeezing the dough through a piping bag. After my initial attempt, when I put all of the dough in the piping bag, I realized it would be easier if I put only about 1/4 of the dough at a time. It was pretty easy after that adjustment. But if you don’t have a piping bag, you can just roll the dough into logs, then shape into “horseshoes” and bake that way.
You won’t get the ridges that give the cookies the distinctive shape that comes with a piping tip, but they’ll still be delicious. I used white cornmeal because that’s the only type I had on hand, but if you have yellow cornmeal, they’ll be a prettier color and closer to the traditional crumiri you see in Italy.
To drizzle with chocolate, just melt a few squares of dark chocolate (or milk chocolate, if you prefer), and scoop it into a pastry bag. You don’t need a special tip, just snip a bit off the bottom of the bag.
Then drizzle some, and leave others just coated with confectioners’ sugar.
Don’t forget to get the espresso brewing!
Click here to connect with me on Instagram and find out what’s cooking in Ciao Chow Linda’s kitchen each day (and more)